
Easy Muffin Tin Recipe with Canned Biscuits
This post may contain affiliate links. Please read the Privacy Policy & Cookie Policy.
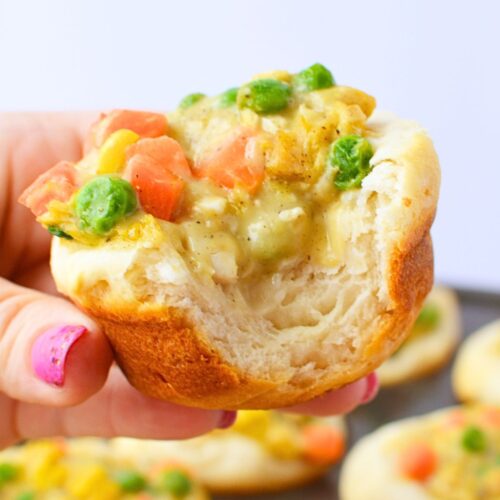
These chicken pot pie cups are one of my go-to dinners when I need something easy, filling, and guaranteed to get eaten. Creamy chicken filling is tucked inside a biscuit cup and baked in a muffin tin. They come together in about 40 minutes and the whole pan disappears fast.
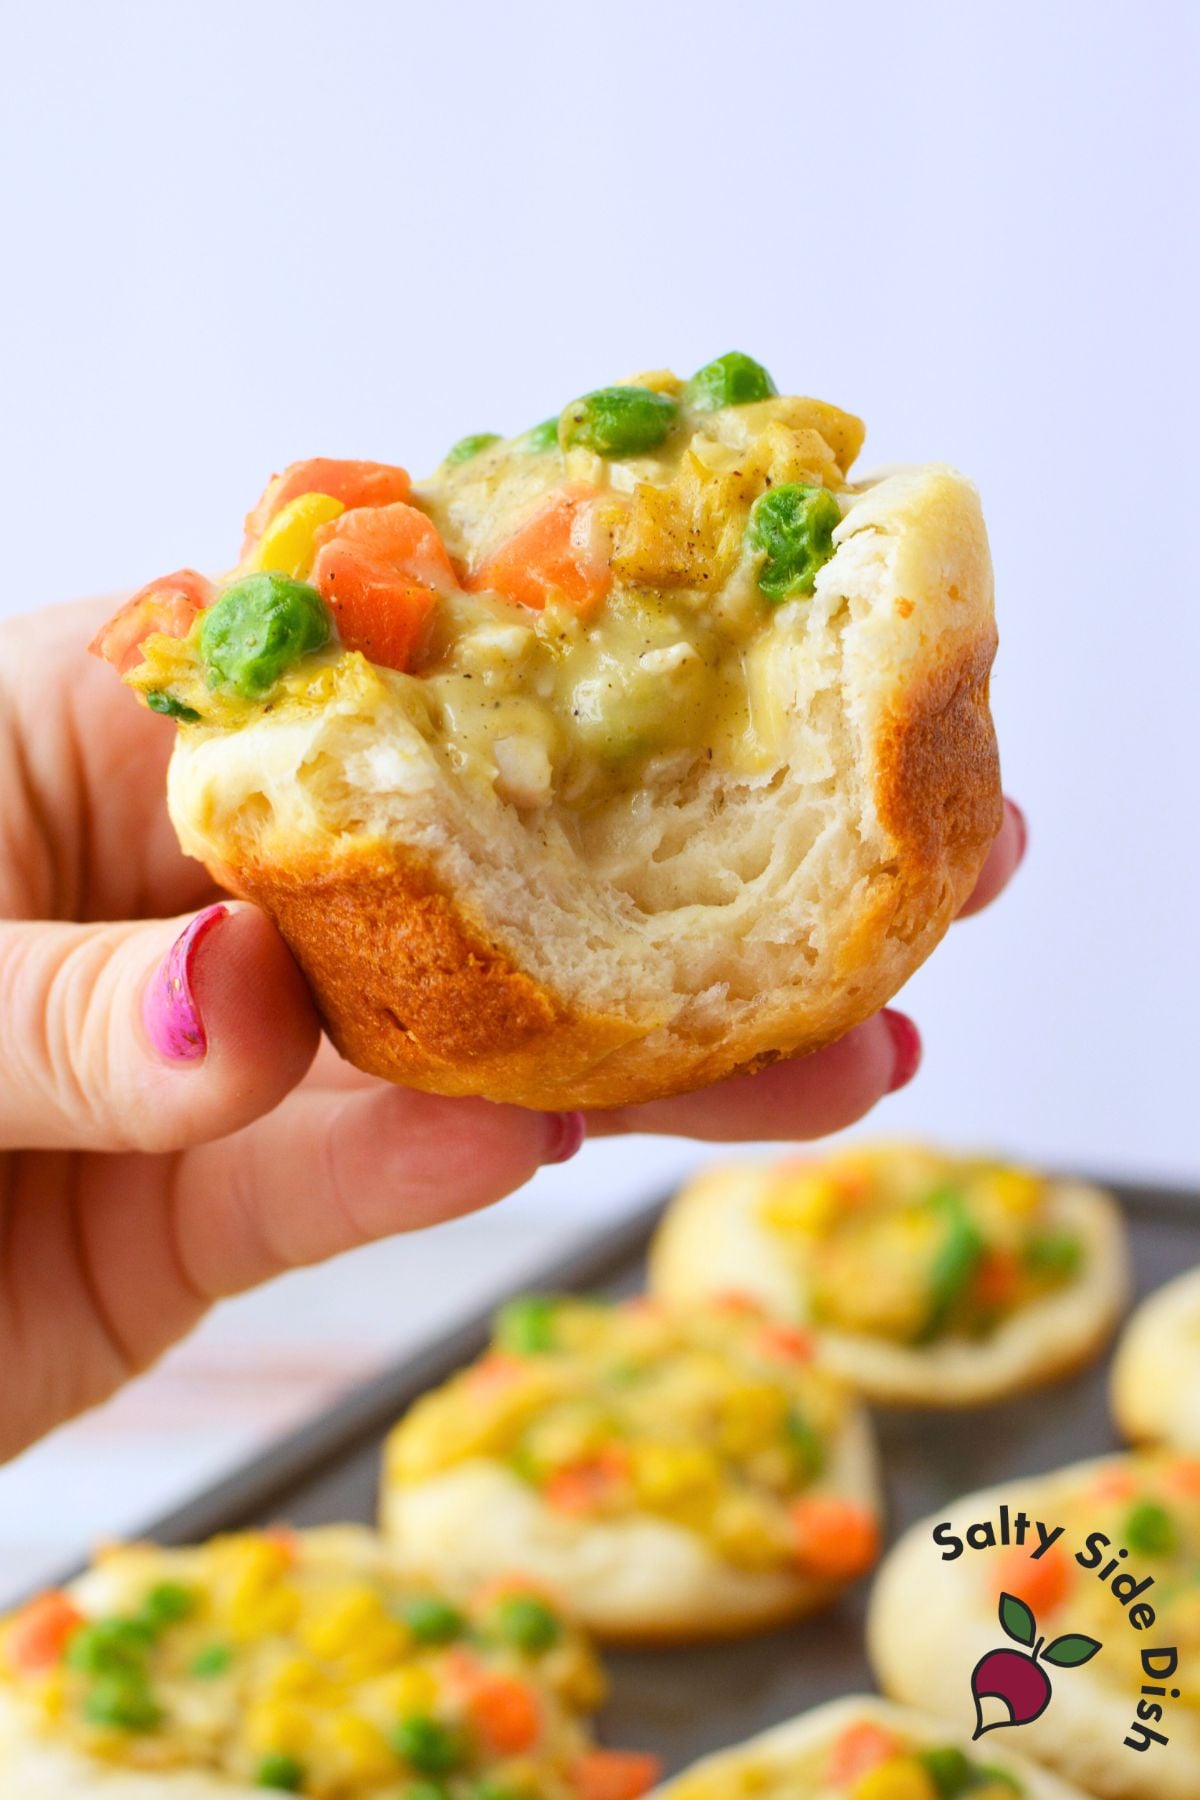
The trick is to use regular jumbo buttermilk biscuits, not the flaky layered kind. Regular biscuit dough is sturdy enough to press into a muffin cup and hold its shape while baking.
The filling is made in one bowl with no cooking required before it goes in the oven. Cream of chicken soup, diced cooked chicken, thawed frozen veggies, and a few spices — just stir it together and spoon it in.
My husband picks out every green bean he can find, so I pull most of them out before mixing. Totally customizable, totally fine.
Ingredients for Chicken Pot Pie Cups
- 1½ tubes (12 biscuits) jumbo buttermilk biscuits — not flaky layers
- 1 bag (12 oz) frozen mixed vegetables, thawed
- 1 can (10.5 oz) cream of chicken soup
- 2 cups cooked chicken, diced
- ½ teaspoon ground thyme
- ½ teaspoon garlic powder
- ½ teaspoon onion powder
- ¼ teaspoon salt
- ¼ teaspoon ground black pepper
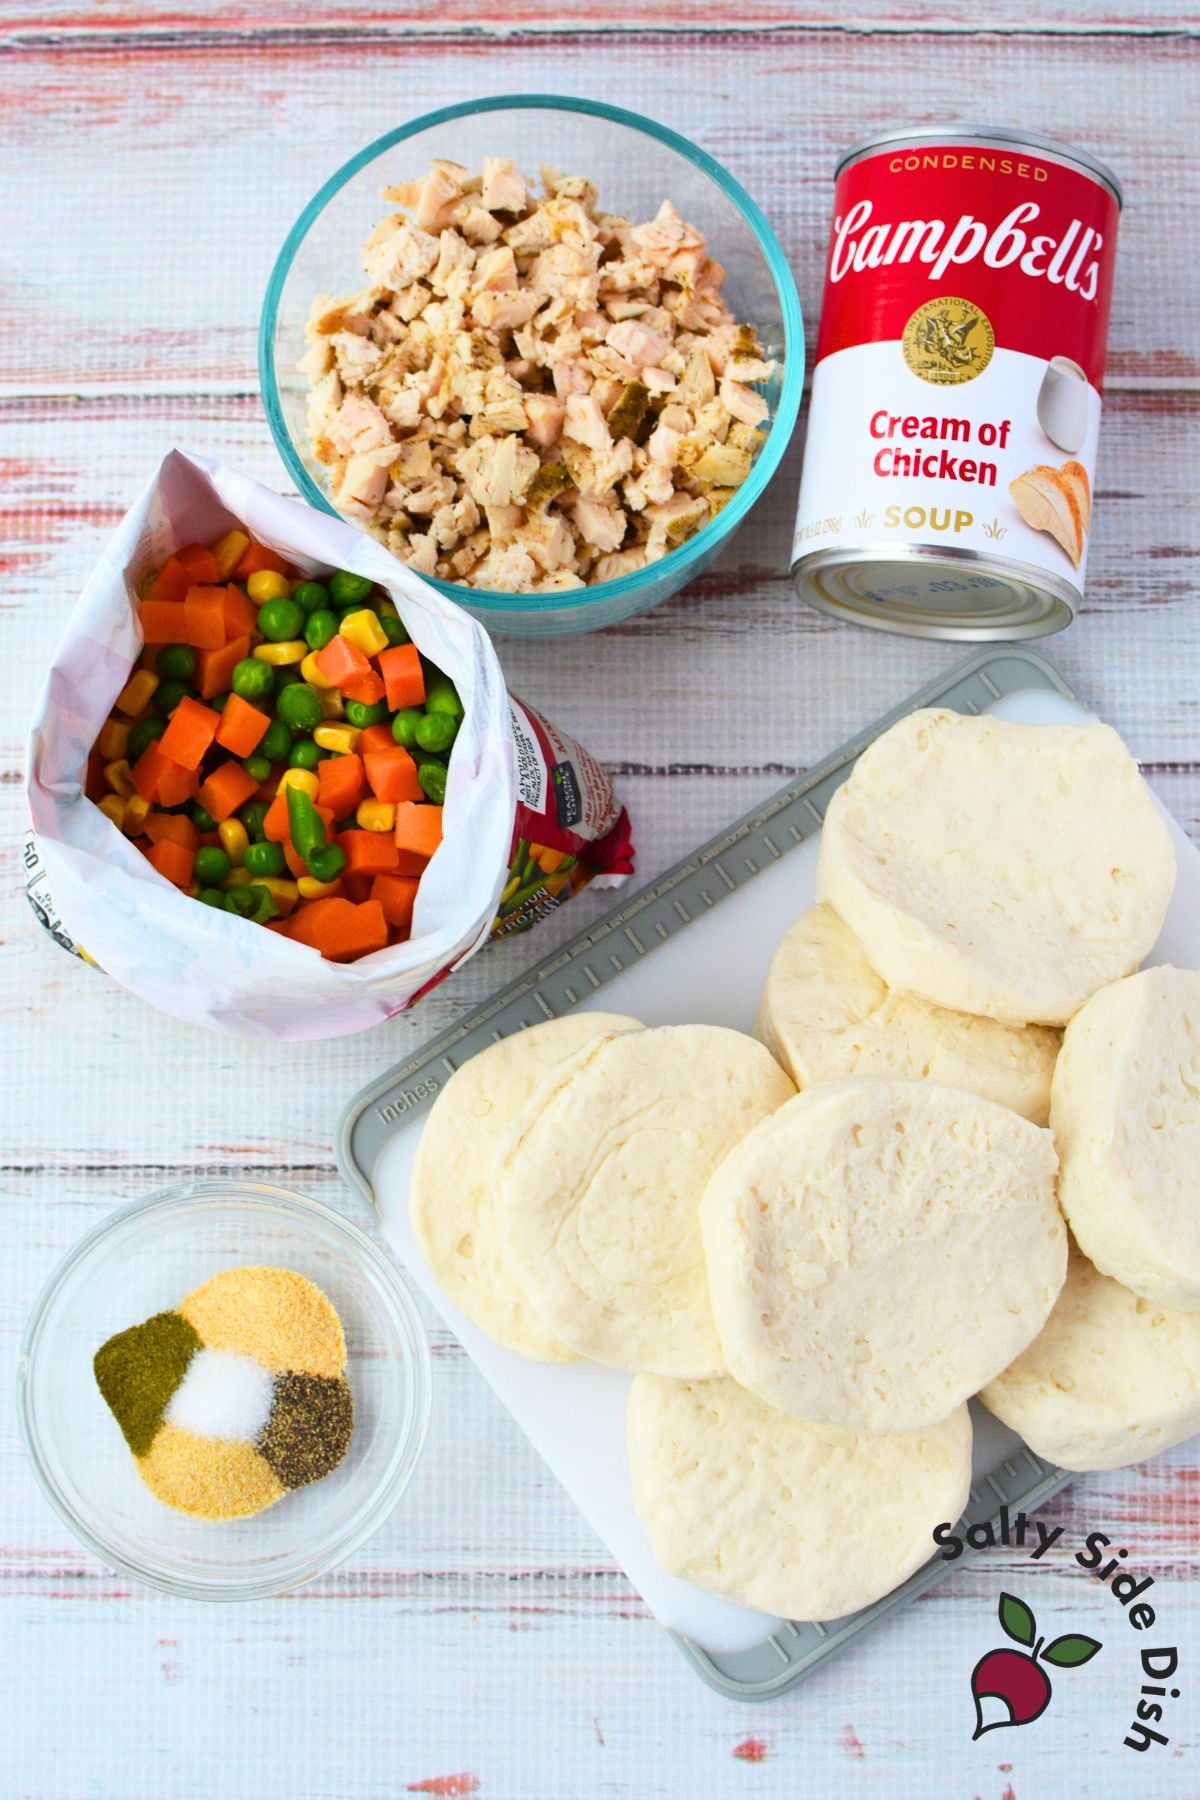
| INGREDIENT NOTES Biscuits: Each tube has 8 biscuits and is 16 oz. You need 1½ tubes for 12 cups. Do not use flaky layers — they won’t hold their shape. Chicken: Rotisserie chicken is the fastest option. Leftover baked or poached chicken works great too. Canned chicken works in a pinch. Vegetables: Thaw the bag fully and pat dry before mixing. Extra moisture will make the filling watery. Swap in whatever your family will actually eat. Dark pan tip: Bake at 350°F if your muffin tin is dark. Light-colored pans can handle 375°F. Dark pans hold more heat and will overbrown the bottoms before the tops are done. |
How to Make Chicken Pot Pie Cups
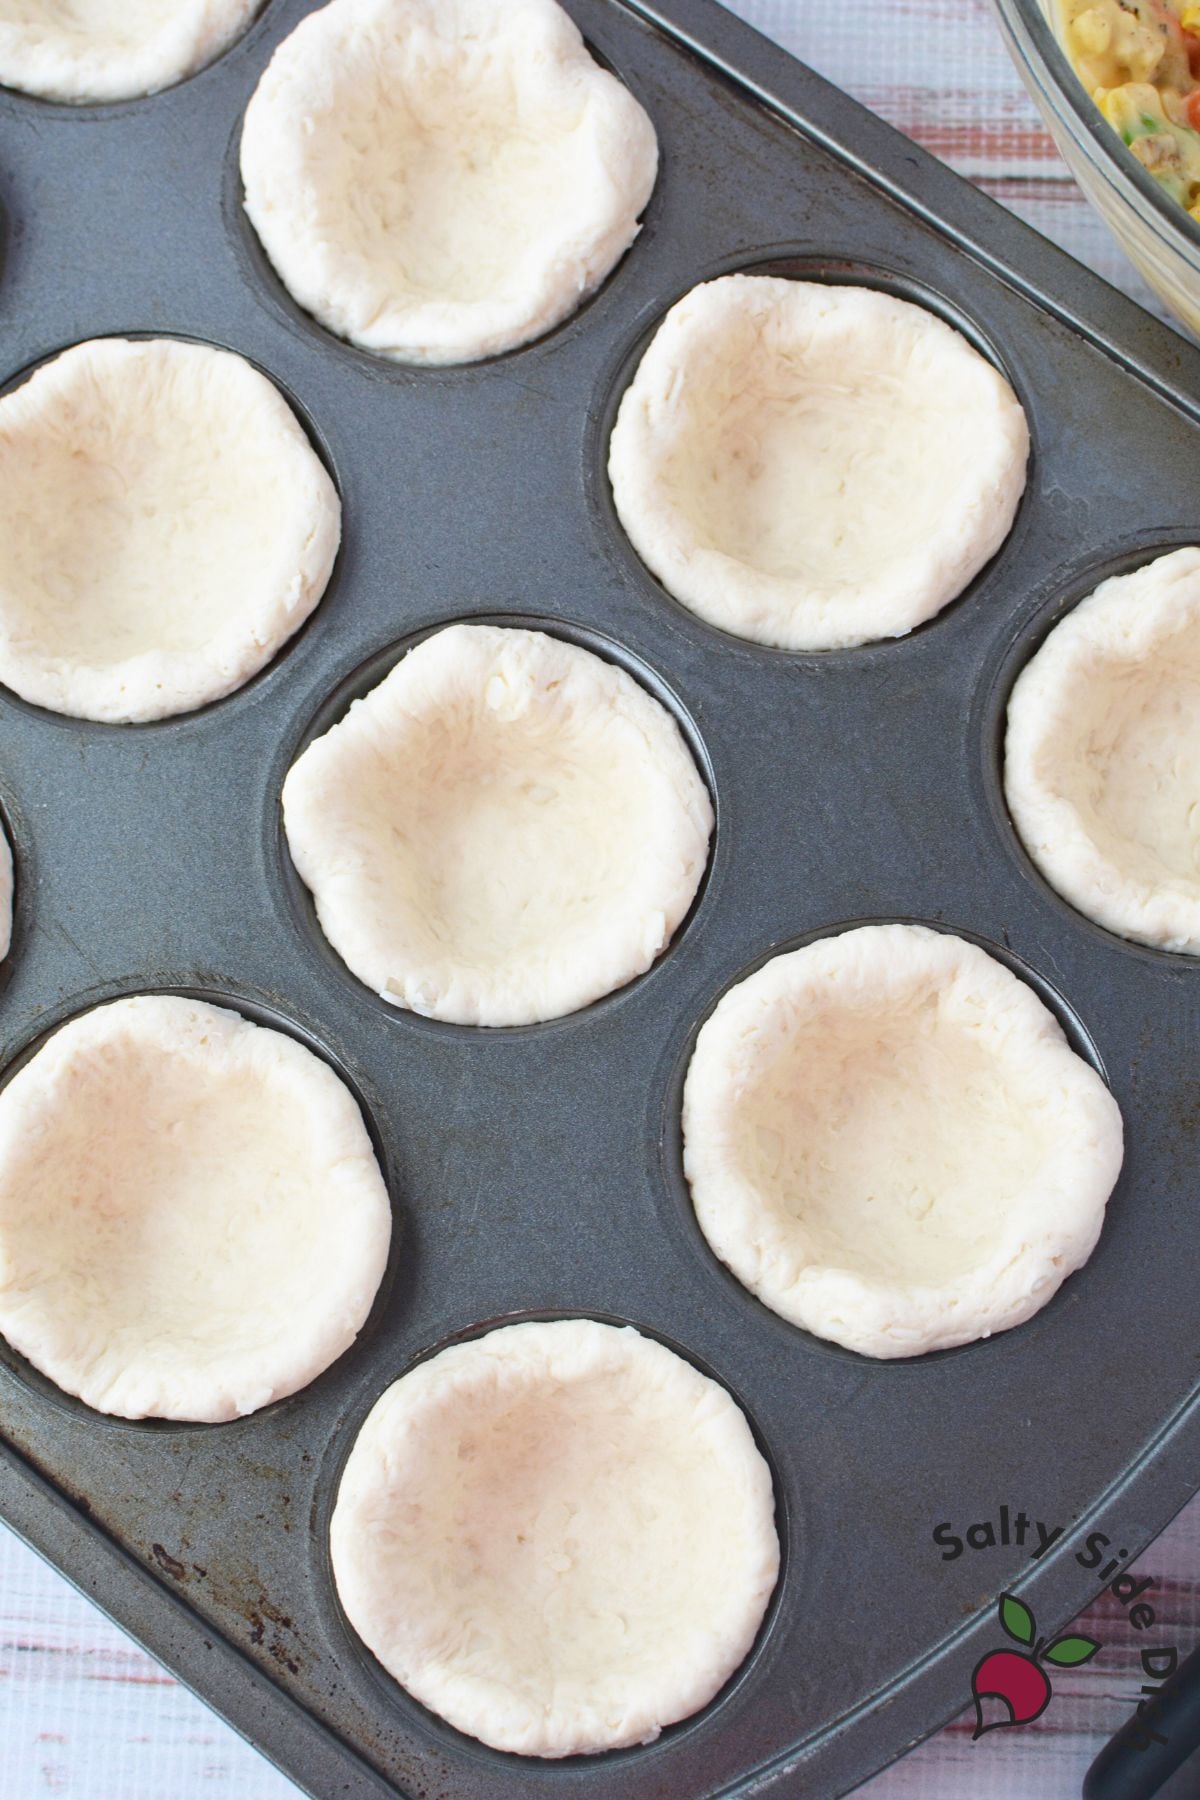
Preheat oven to 350°F (or 375°F for a light-colored pan). Spray a 12-cup muffin tin generously with nonstick cooking spray.
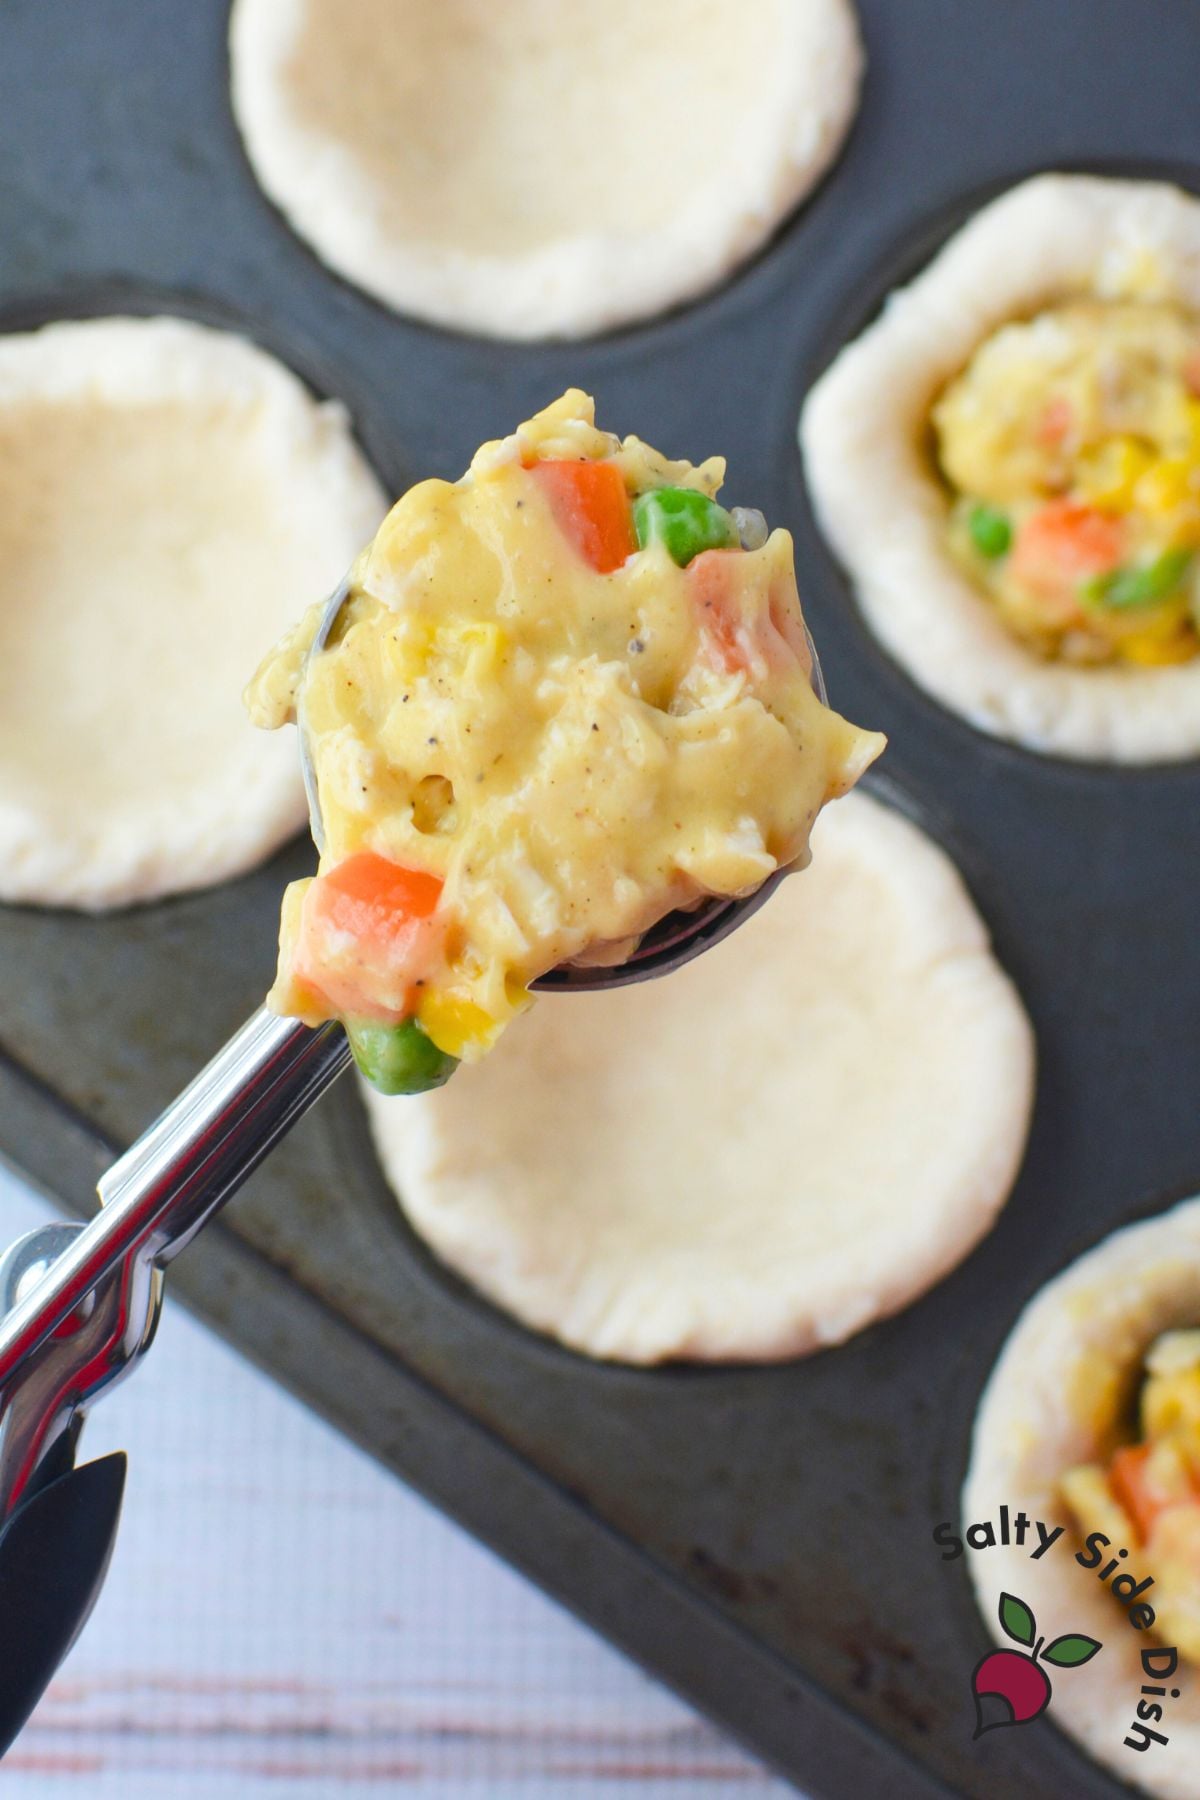
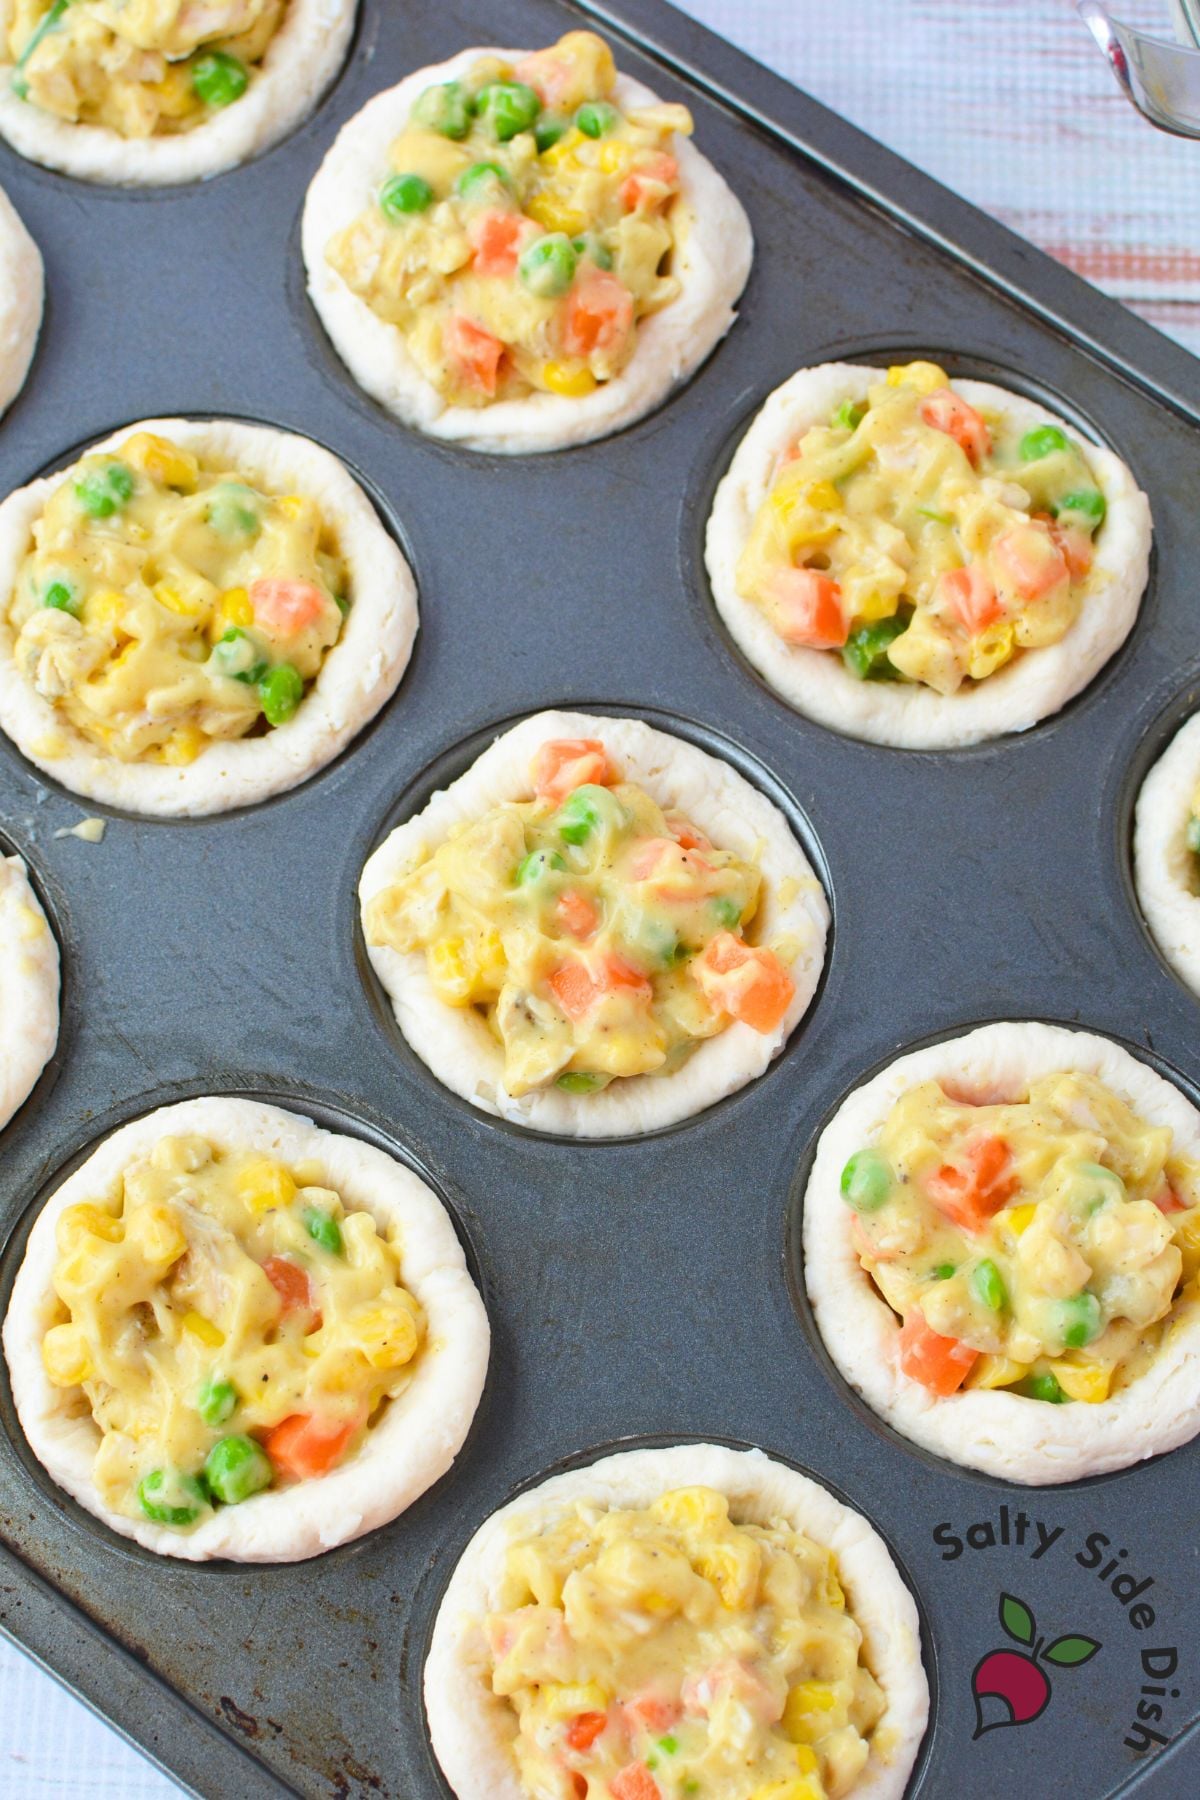
Separate all 12 biscuits. Use the palm of your hand to flatten each one into a round disc about 4–5 inches across.
Press one biscuit into each muffin cup, working the dough up the sides to form a cup. Set aside.
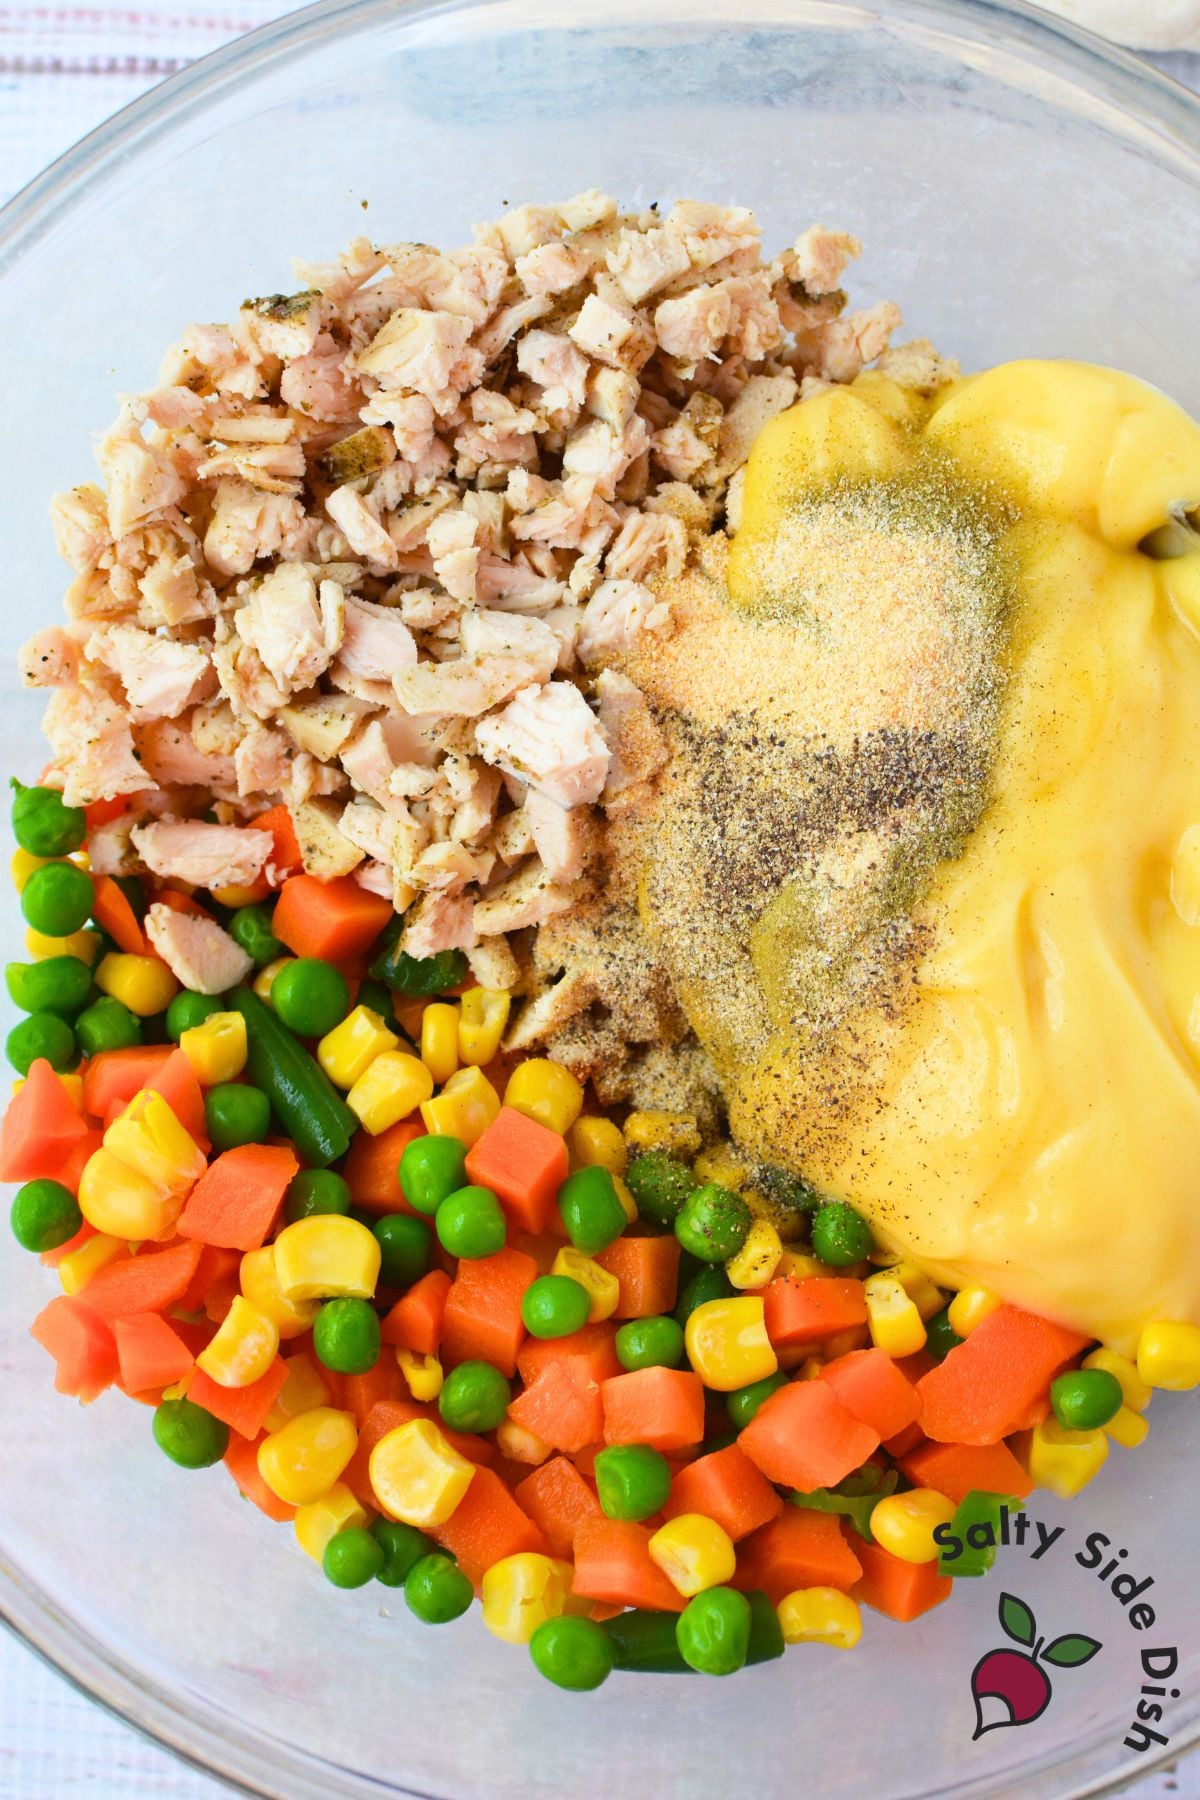
In a large bowl, stir together the thawed vegetables, cream of chicken soup, diced chicken, thyme, garlic powder, onion powder, salt, and pepper until evenly combined.
Spoon about 3 tablespoons of filling into each biscuit cup. Don’t overfill — the edges need space to rise and brown.
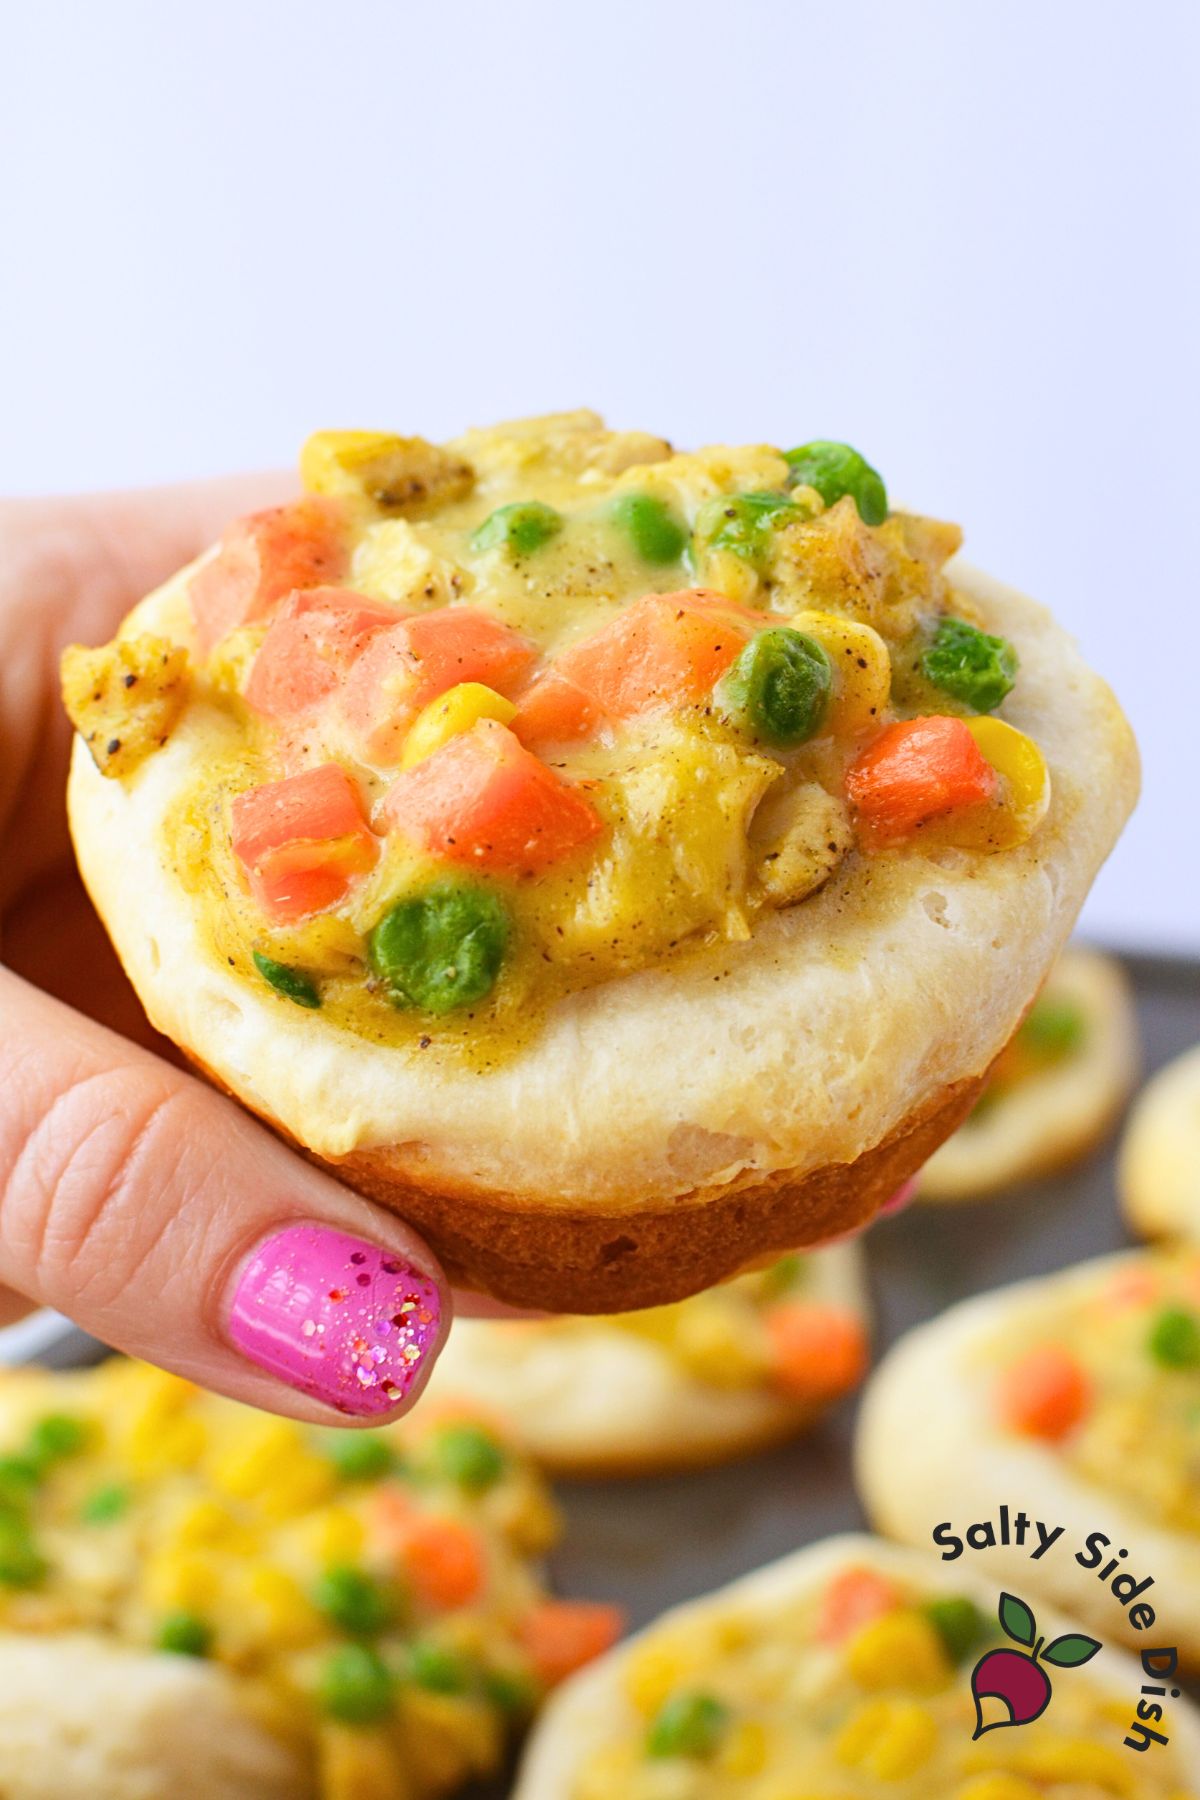
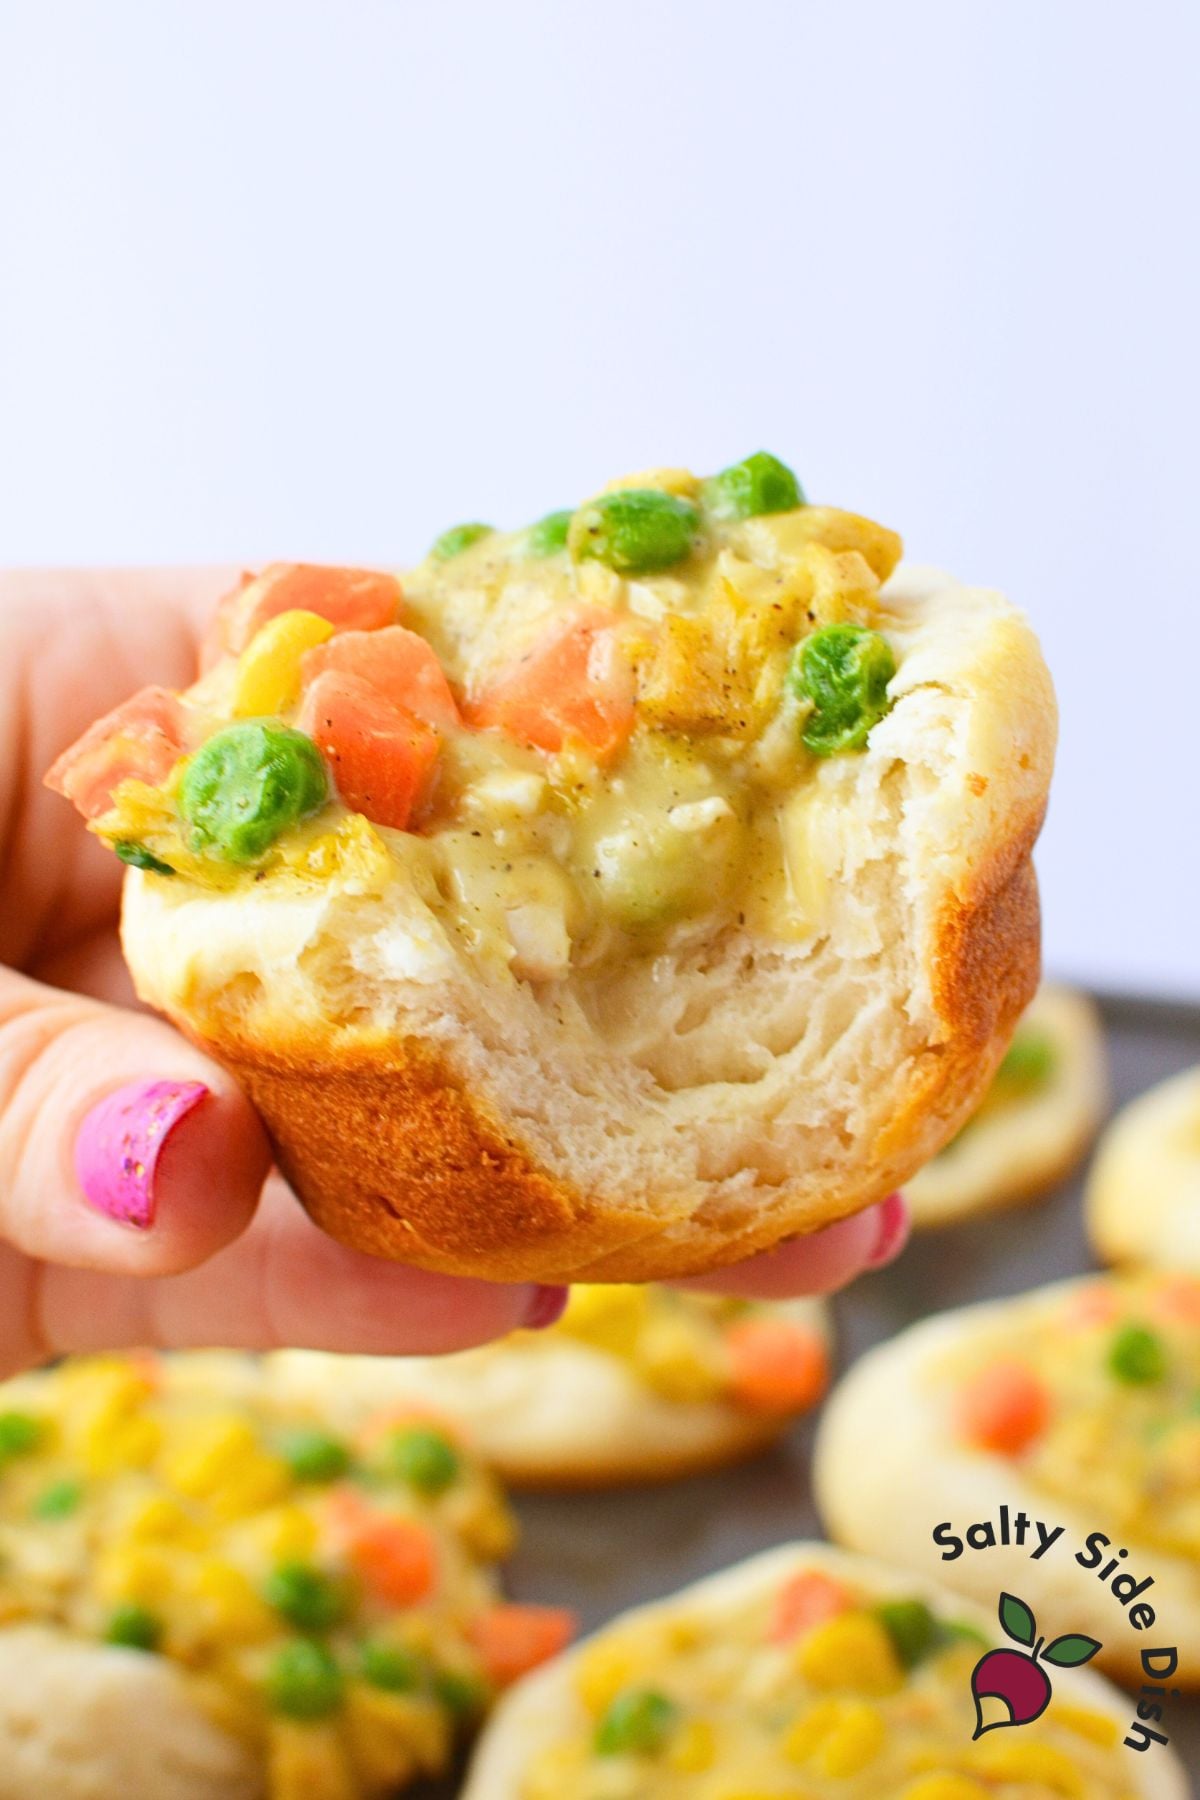
Bake 20–24 minutes, until the biscuit edges are golden brown and the filling is hot and bubbling.
Let the cups rest in the pan for 5 minutes. Run a butter knife around the edge of each cup to release, then lift out and serve.

Tips for the Best Chicken Pot Pie Cups
Don’t skip the rest time. Five minutes in the pan makes a real difference. The cups firm up as they cool slightly and release cleanly instead of falling apart when you try to lift them out.
Spray the pan generously. A light coat isn’t enough here. Get into the corners of each cup or the biscuit bottoms will stick.
Add cheese. Stir ½ cup shredded cheddar into the filling before spooning it in. It melts into the filling and makes everything richer.
Customize the filling. Mixed veggies are just the starting point. Use whatever frozen vegetables your family likes — peas and carrots, corn, or even diced potato all work well.
Can You Make Chicken Pot Pie Cups Ahead of Time?
Yes, and they hold up well. These are one of the better meal prep lunches I’ve made. They reheat in the microwave in about 60–90 seconds and the filling stays creamy instead of separating or getting watery.
Make ahead unbaked: Assemble the filled cups in the muffin tin, cover with plastic wrap, and refrigerate for up to 24 hours before baking. Add 2–3 minutes to the bake time if going straight from the fridge.
Refrigerator: Cool completely, then store in an airtight container for up to 4 days. Reheat individual cups in the microwave for 60–90 seconds.
Freezer: Cool completely, wrap each cup individually in plastic wrap, and freeze for up to 2 months. Thaw overnight in the refrigerator before reheating. The biscuit softens slightly after freezing but still tastes great.

Chicken Pot Pie Cups — Frequently Asked Questions
Can I use flaky biscuits for pot pie cups?
No — flaky layered biscuits will separate and puff instead of holding the cup shape. Use regular jumbo buttermilk biscuits for a sturdy base that holds the filling.
What can I substitute for cream of chicken soup?
Cream of mushroom or cream of celery both work well and give the filling a slightly different but equally good flavor. You can also make a quick homemade version with butter, flour, chicken broth, and milk if you prefer to avoid canned soup.
How do I keep chicken pot pie cups from sticking?
Spray the muffin tin generously and don’t be shy with it. Let the cups rest in the pan for the full 5 minutes after baking, then run a thin spatula or butter knife around each cup before lifting out.
Why are the bottoms of my biscuit cups burning?
Dark muffin tins retain more heat and will brown the bottoms before the tops are done. Drop the oven to 350°F and move your rack to the center position. Check at the 20-minute mark.
Can I double the recipe?
Absolutely. Scale the filling ingredients up and work in batches if you only have one muffin tin. The baked cups hold well in the fridge for 4 days, so making a double batch for the week is worth it.
Chicken Pot Pie Cups
Equipment
- 12 muffin tin light colored
Ingredients
- 12 biscuits jumbo buttermilk biscuits not flaky layers – from 1½ tubes
- 12 oz. frozen mixed vegetables thawed and drained of excess moisture
- 10.5 oz. cream of chicken soup
- 2 cups cooked chicken diced
- ½ tsp ground thyme
- ½ tsp garlic powder
- ½ tsp onion powder
- ¼ tsp salt
- ¼ tsp ground black pepper
Instructions
- Preheat oven to 350°F if using a dark muffin tin, or 375°F for a light-colored pan. Generously spray a 12-cup muffin tin with nonstick cooking spray.
- Flatten each jumbo buttermilk biscuit (regular, not flaky layers) with the palm of your hand and press into each muffin cup, working the dough up the sides to form a cup shape.
- In a bowl, stir together thawed vegetables (patted dry so the filling doesn’t get watery), cream of chicken soup, diced chicken, thyme, garlic powder, onion powder, salt, and pepper. Rotisserie chicken works great here — canned chicken works in a pinch.
- Spoon about 3 tablespoons of filling into each biscuit cup. I use a tablespoon scoop to accurately measure.
- Bake 20–24 minutes until edges are golden brown. Let stand in the pan for 5 minutes, then run a knife around each cup and remove.
Nutrition
Nutritional Disclaimer: The nutritional data provided here is auto-calculated and intended for your convenience only. As it’s generated via automation, its accuracy may be compromised. For precise nutritional insight, please compute the values utilizing the actual ingredients in your recipe through your chosen nutrition calculator or application.
Did You Make This Recipe?
Make sure to follow Salty Side Dish on Pinterest and rate the recipe here and make sure to leave a comment below!


