
Strawberry Cheesecake Dump Cake
This post may contain affiliate links, please read our privacy policy for details.
If you’ve ever wanted cheesecake flavor without the work, this strawberry cheesecake dump cake is it. It starts with two cans of strawberry pie filling, a block of cream cheese, and a box of cake mix.
That might sound too simple to be good, but once baked together, you get a gooey strawberry base, tangy cheesecake-style bites, and a buttery golden topping that tastes like cobbler.

And if you love the ease of this recipe, you’ll want to check out my cherry cream cheese dump cake next, it’s the same simple method with a different fruit filling.
Ingredients You’ll Need
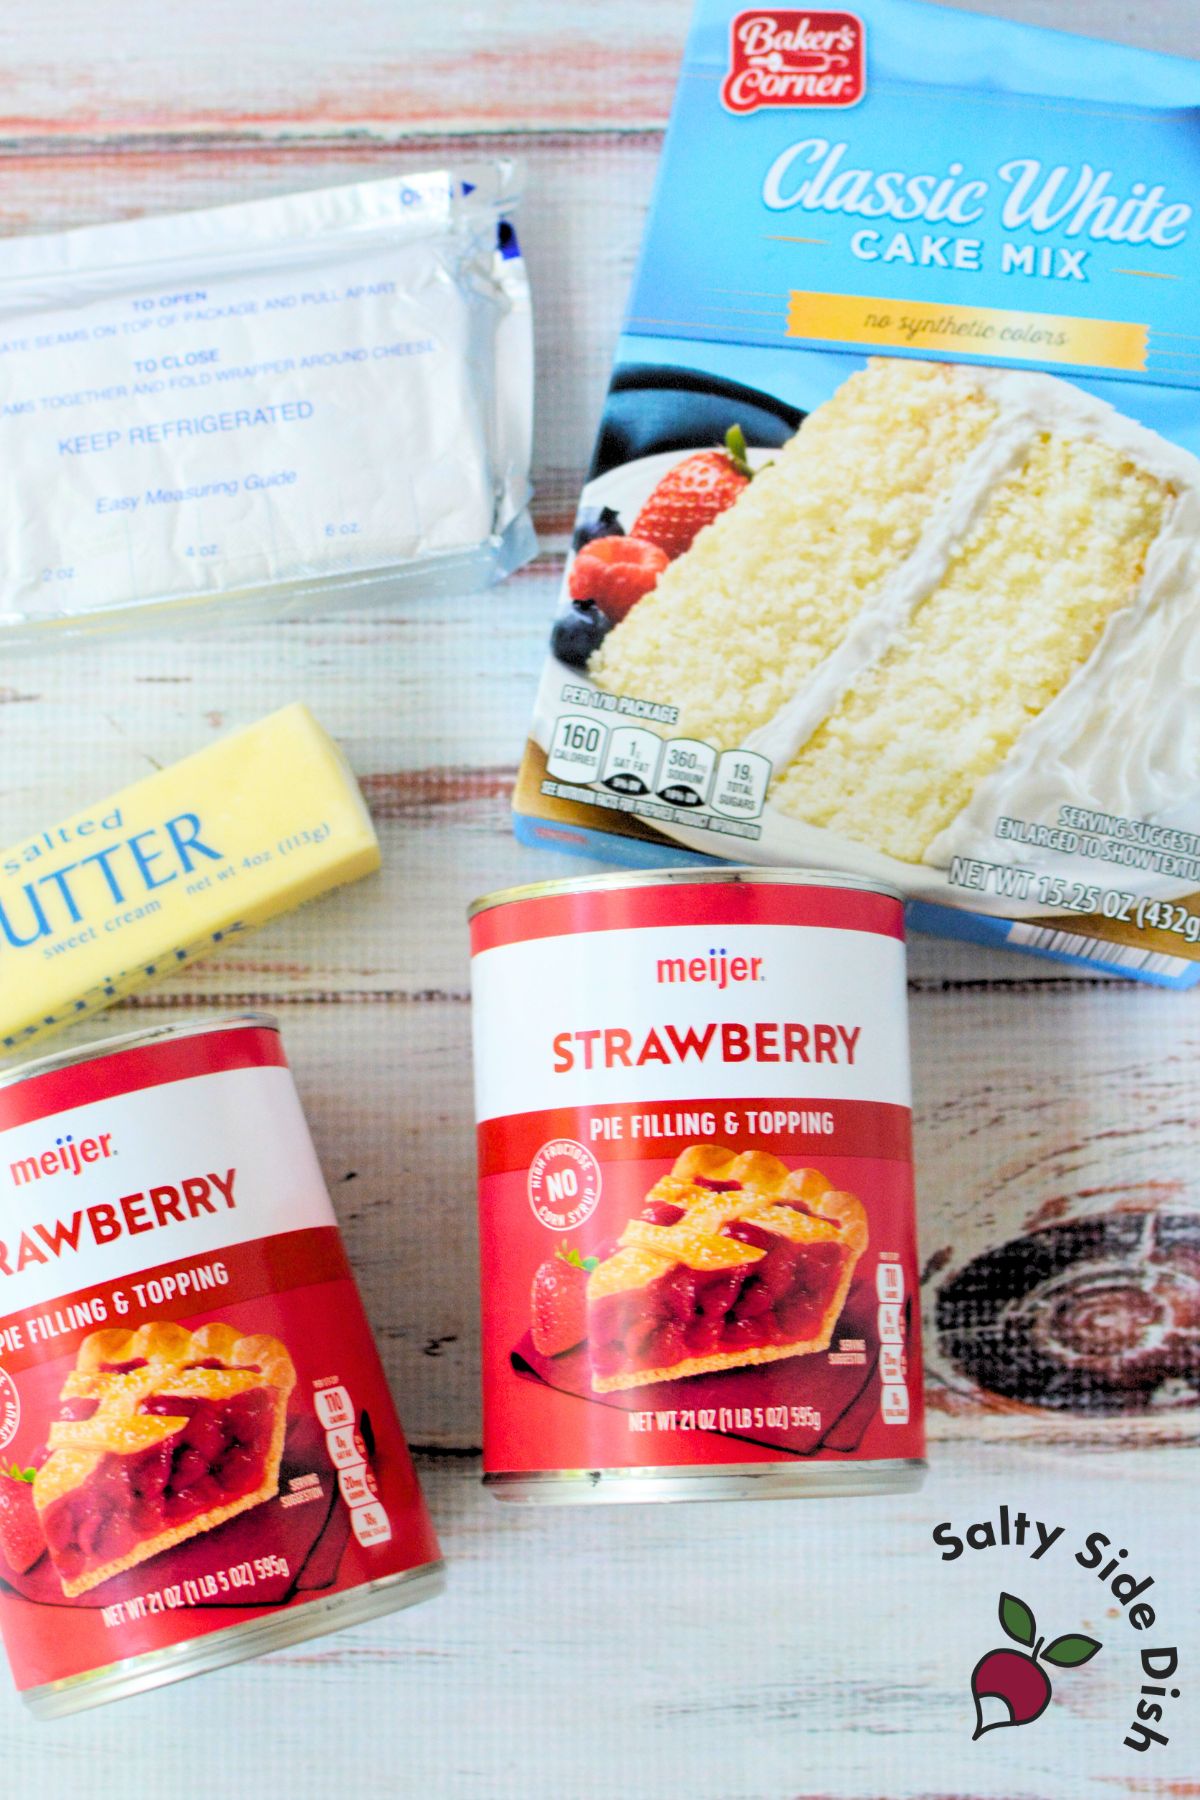
- Strawberry pie filling – Two 21-oz cans are just right for a 9×13 dish.
- Cream cheese – One 8-oz block, softened. Cut into small cubes for the best distribution.
- White cake mix – Standard 15.25-oz box. Yellow cake mix also works.
- Butter – Half a cup (1 stick), melted, to moisten the cake mix topping.
- Vanilla ice cream – Optional, but highly recommended for serving.
How to Make Strawberry Cheesecake Dump Cake
Prep the pan. Preheat oven to 350°F and grease a 9×13 baking dish.
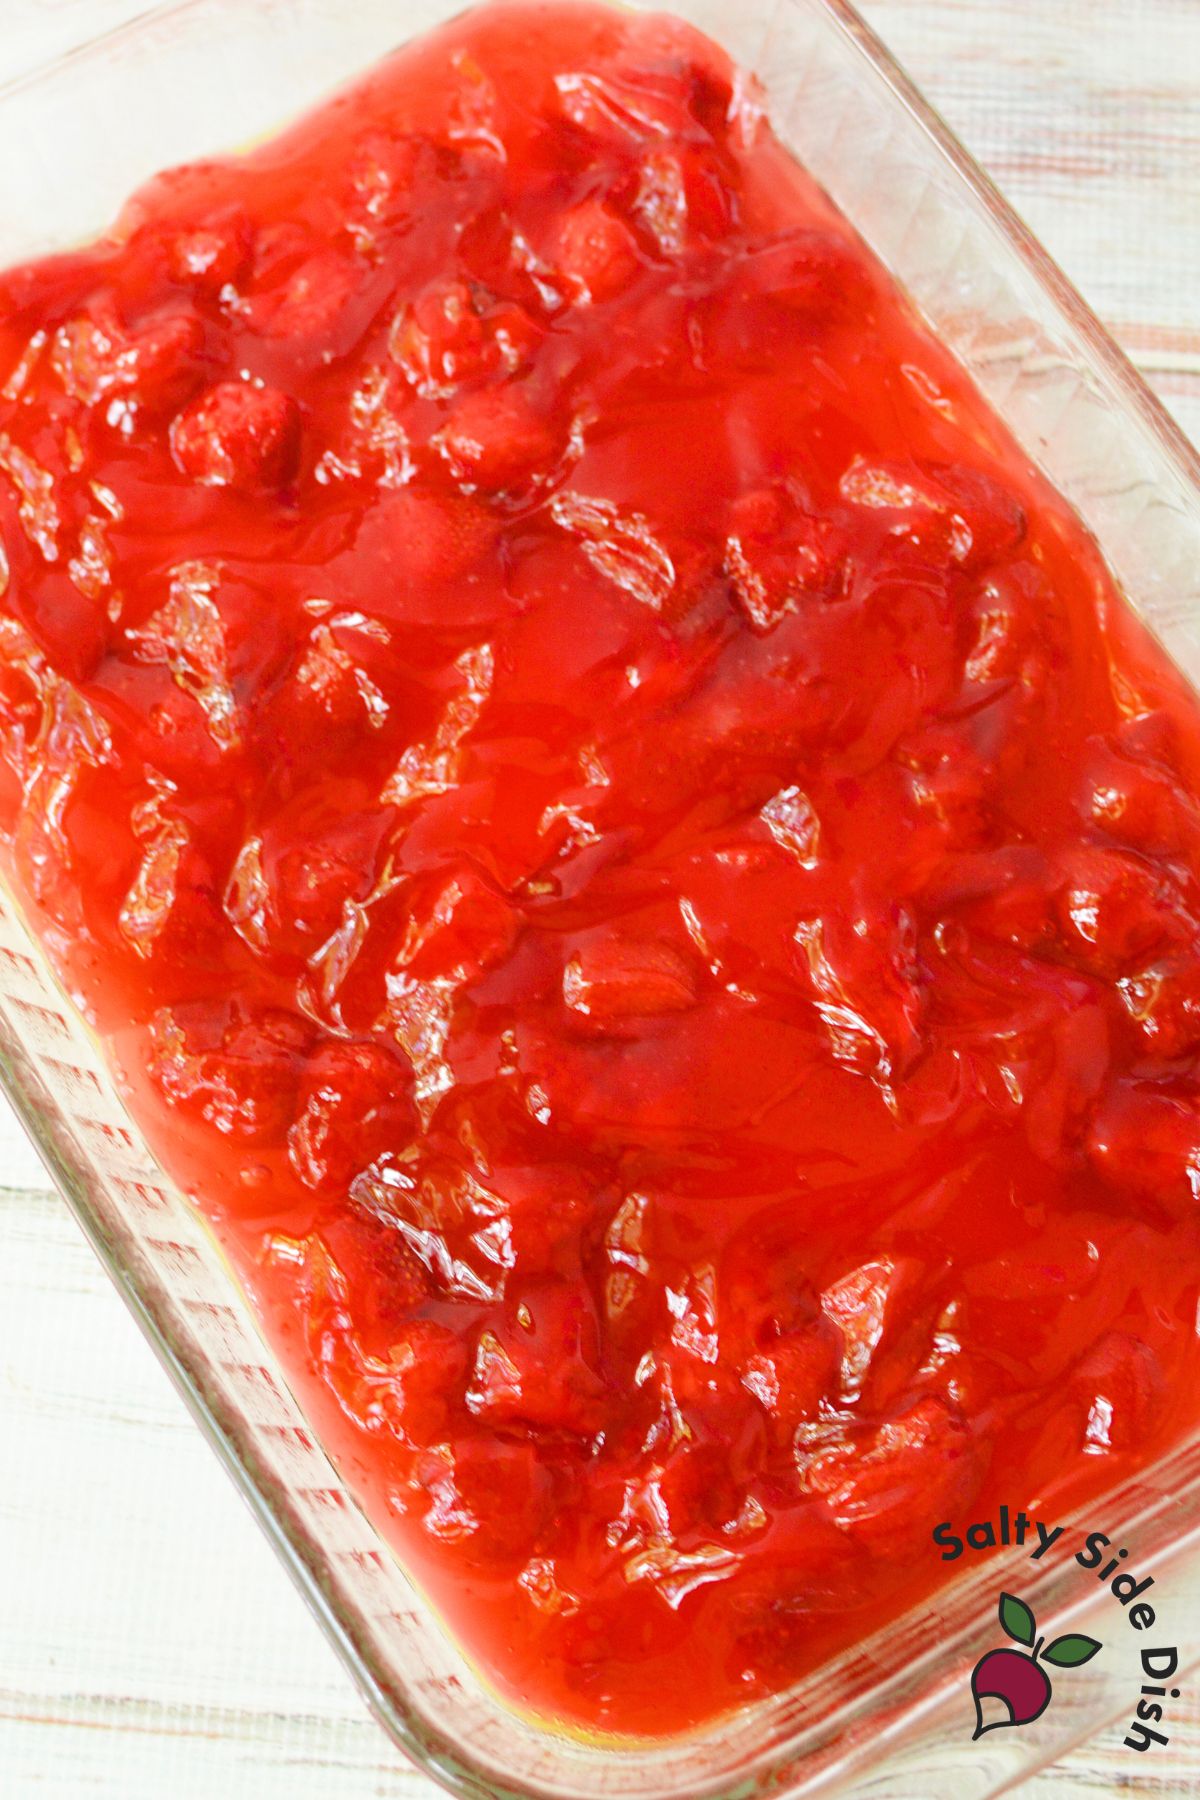
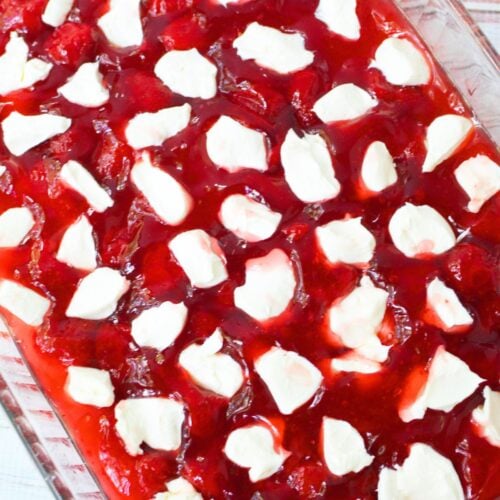
Layer the filling. Spread the strawberry pie filling evenly in the bottom of the dish.
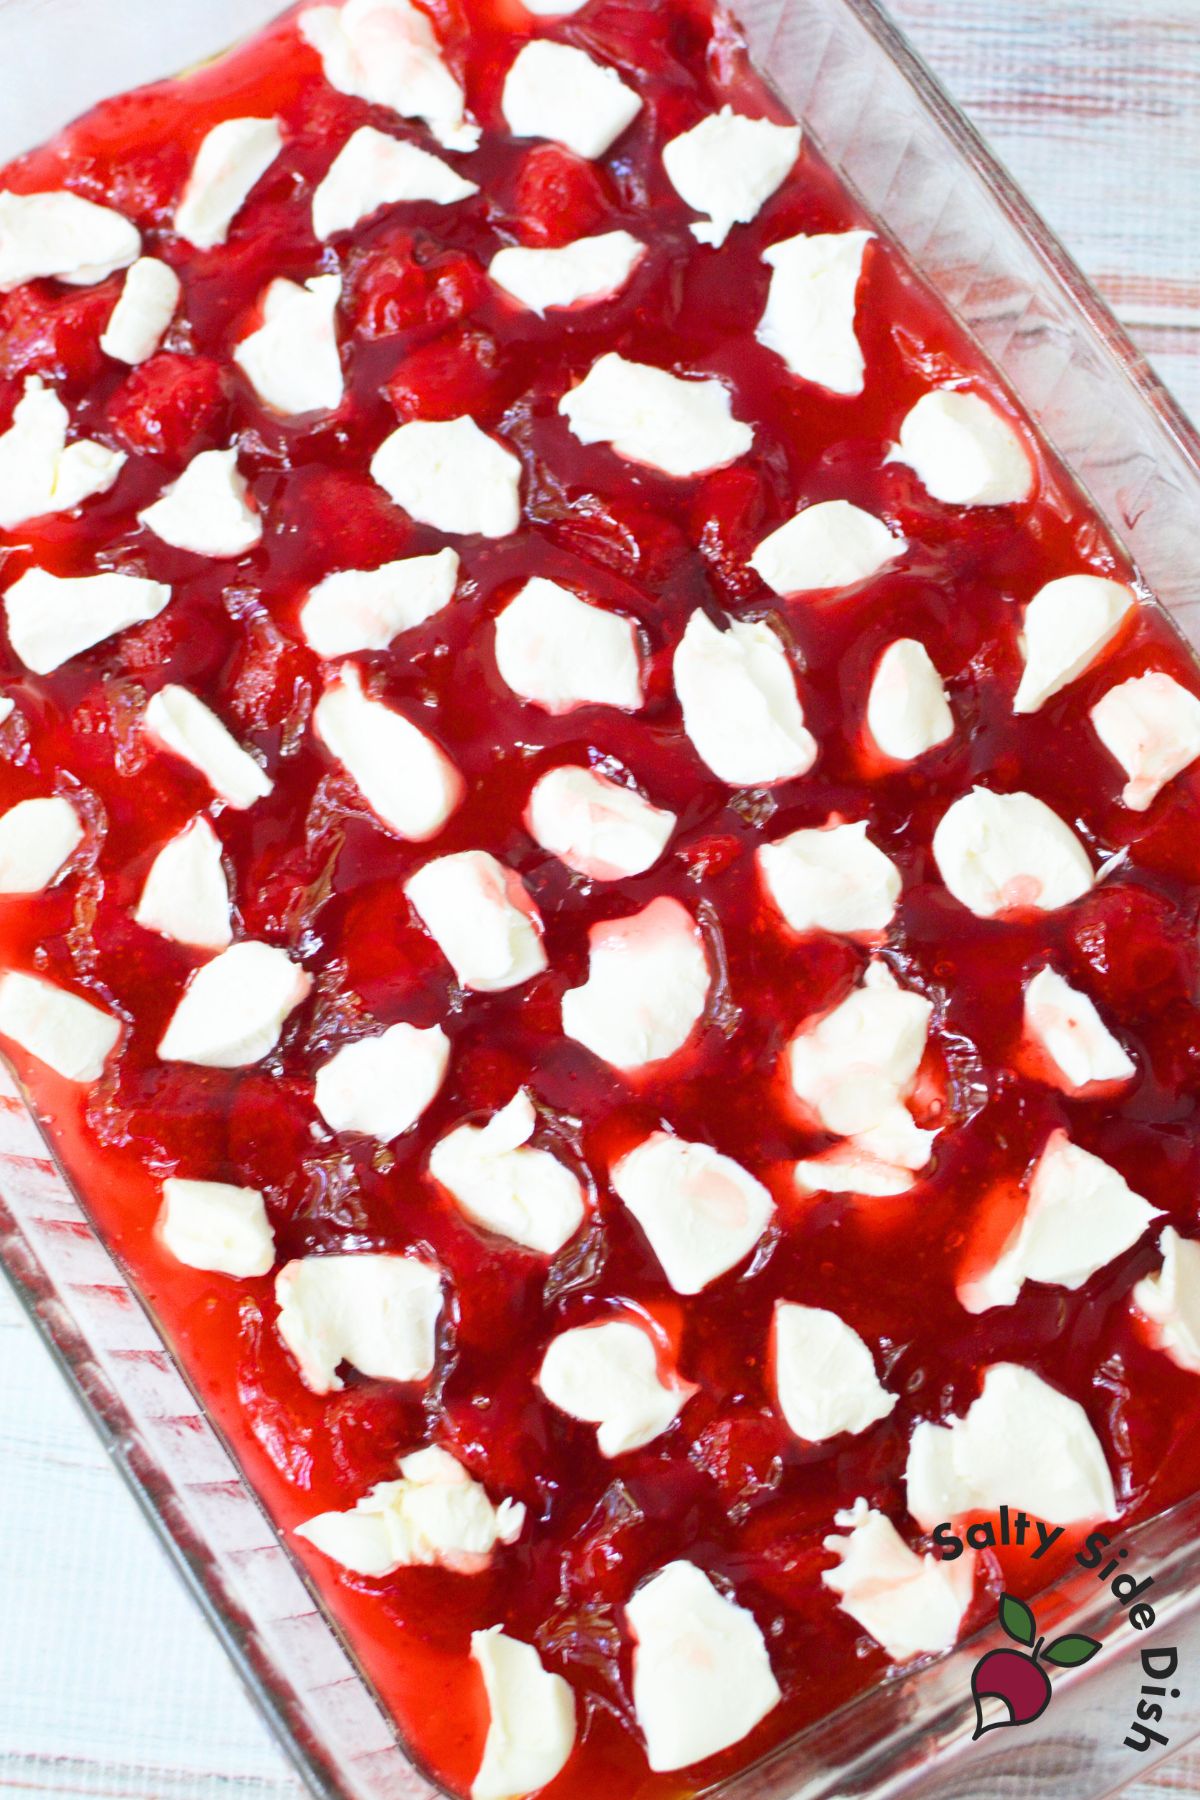
Add the cream cheese. Cut softened cream cheese into small cubes and scatter them evenly over the filling. I was worried plain cream cheese might taste off without adding sugar, but once it bakes into the filling, it’s delicious.
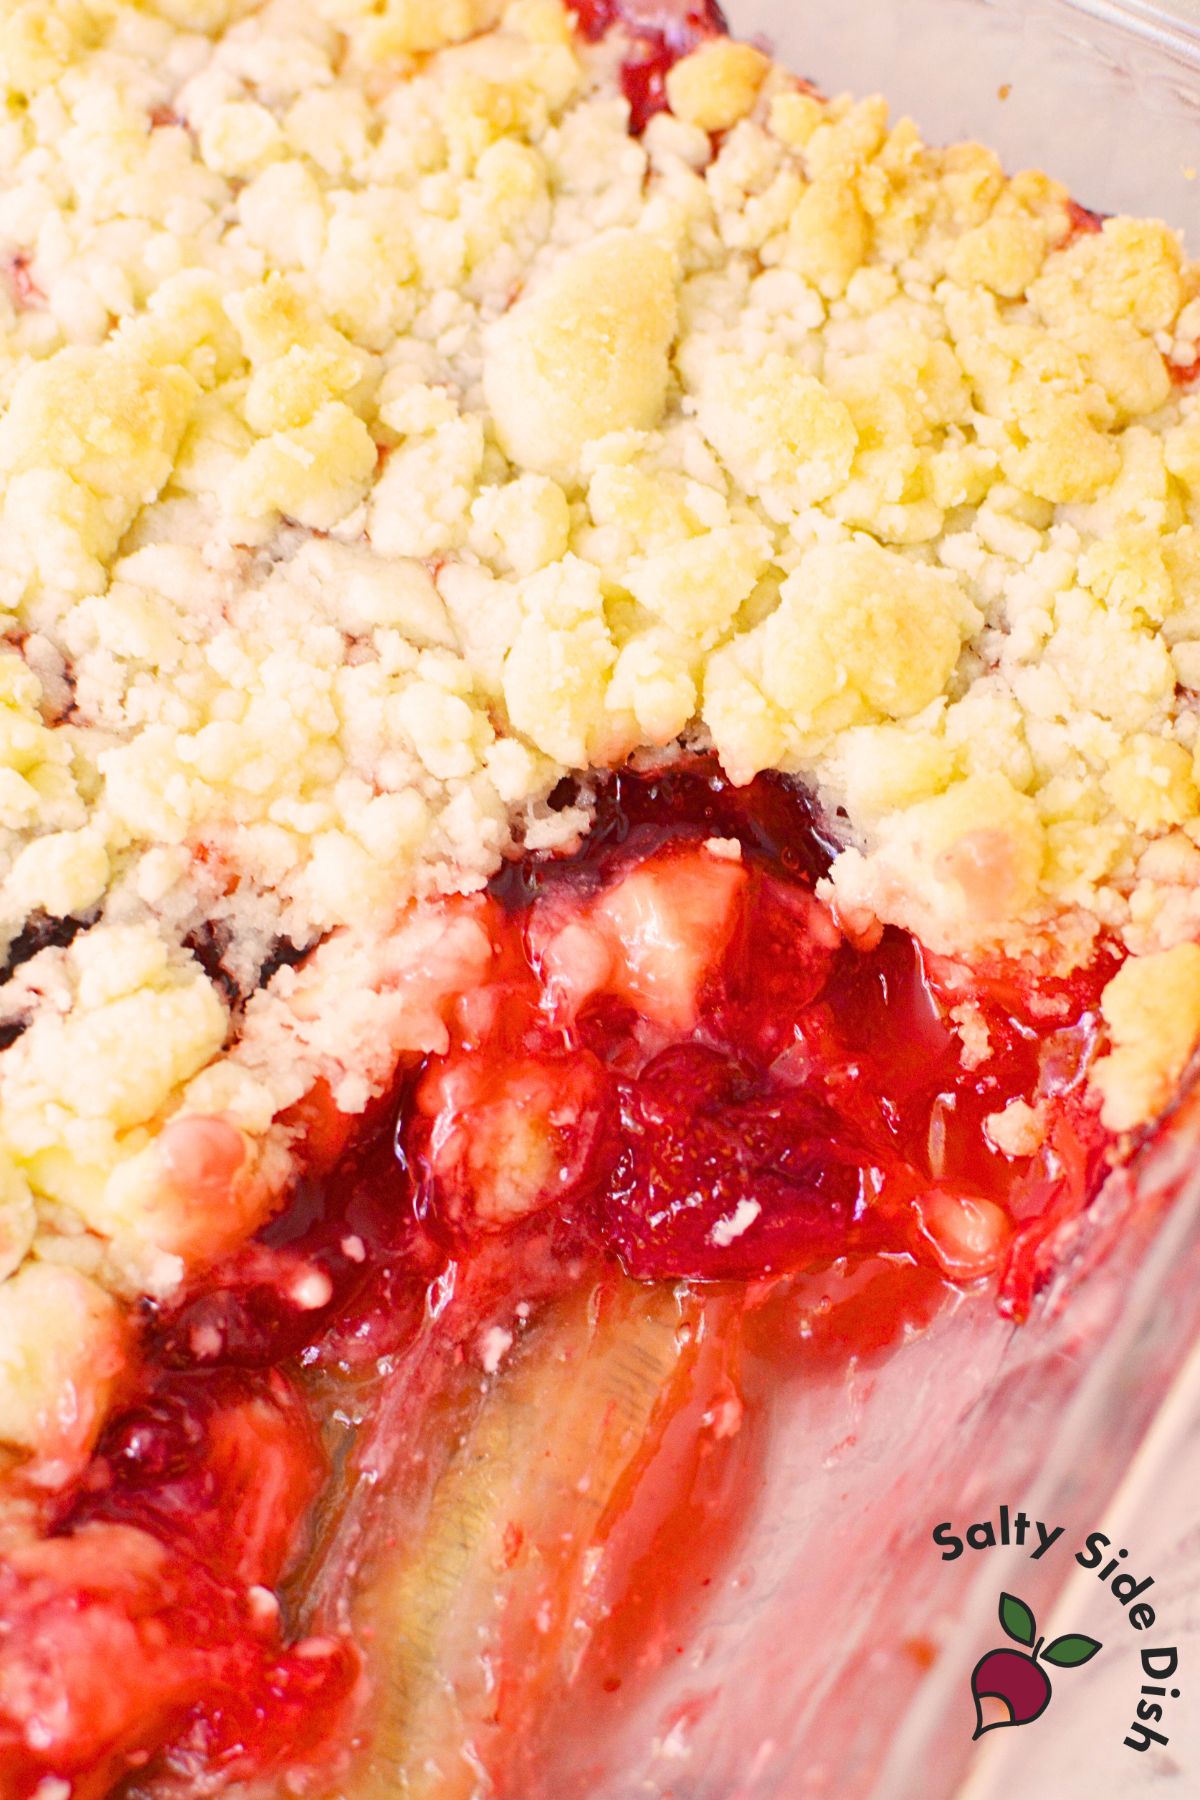
The secret is cutting the cream cheese into small pieces so it melts into the strawberries instead of staying in big clumps. Every scoop gives you strawberry, cheesecake, and cake in one bite.
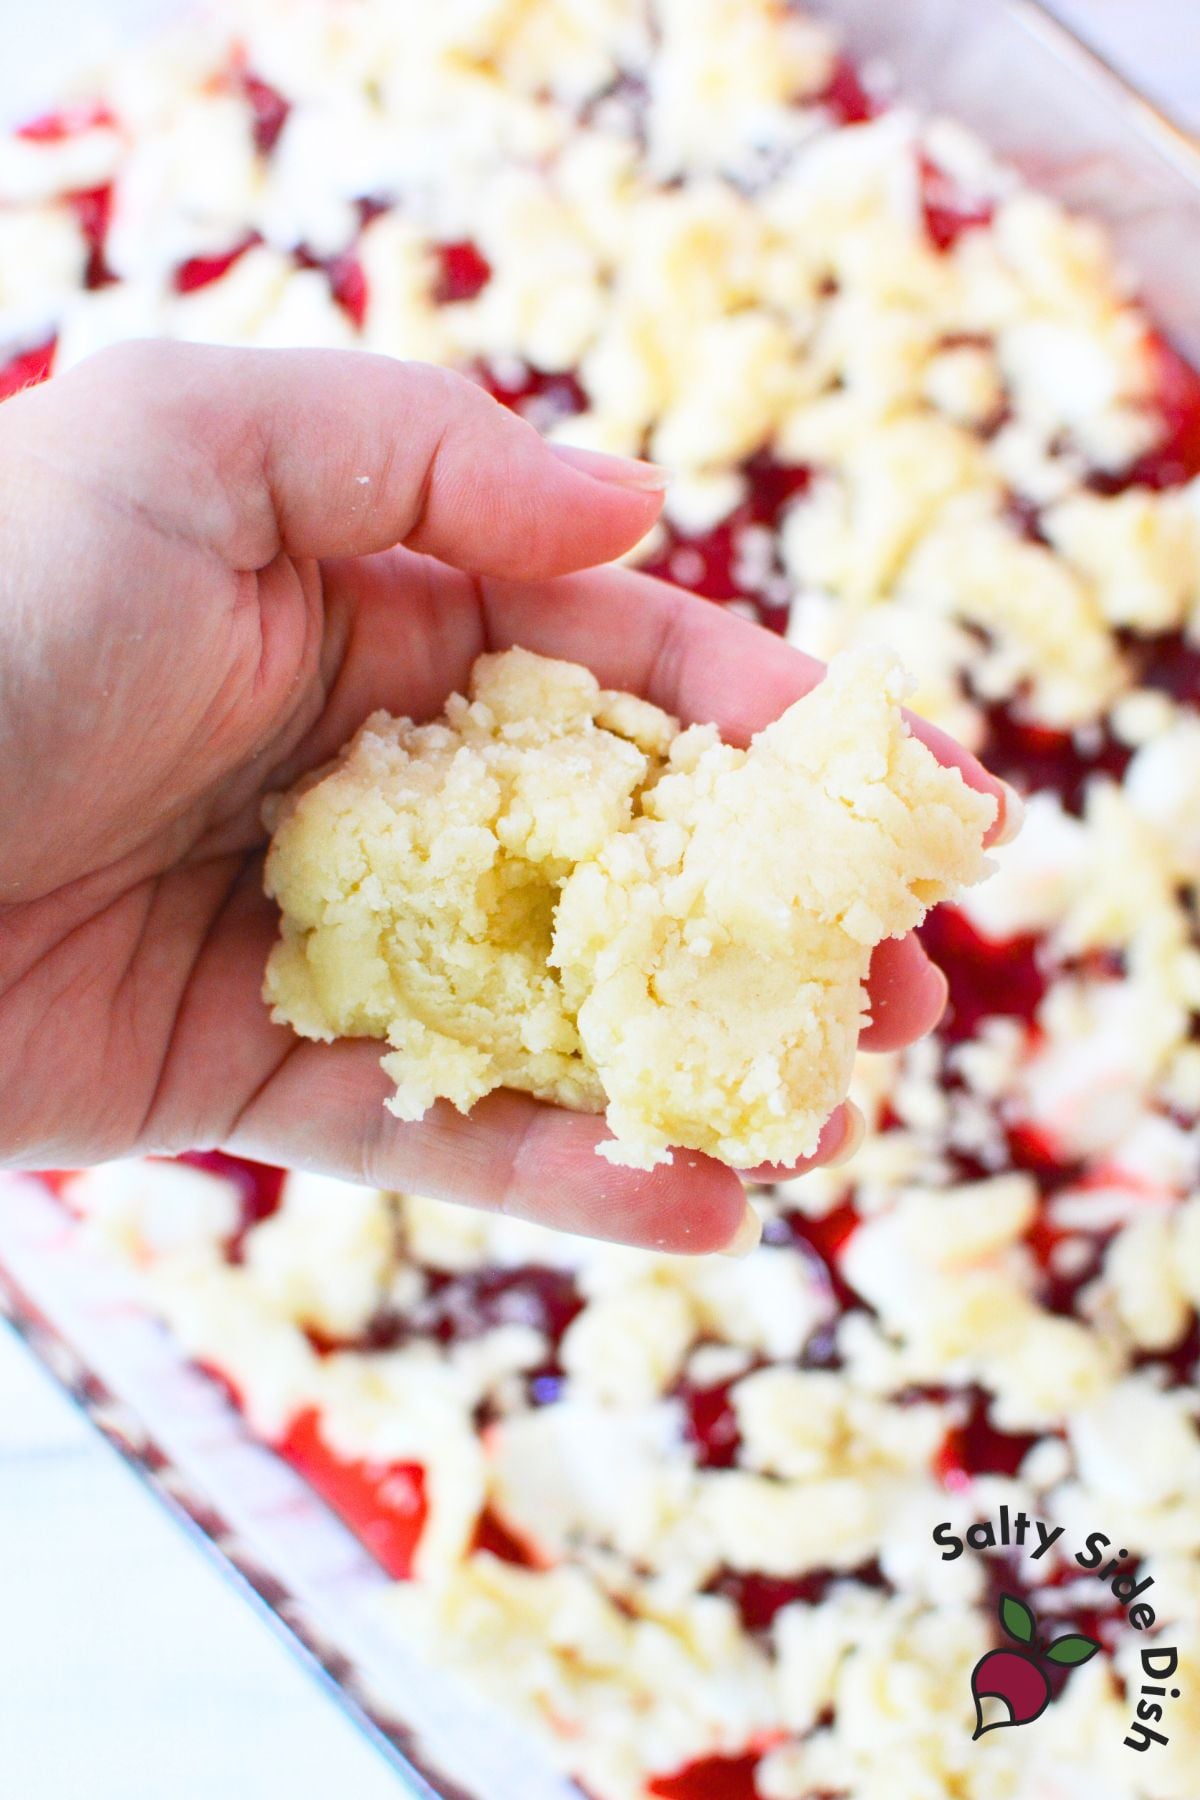
Mix the topping. Stir together the cake mix and melted butter until the mixture is crumbly.
Use your hands to break up any big clumps.
Top and bake. Sprinkle the crumbly cake mixture evenly over the filling. Bake for about 35 minutes, until golden on top and bubbling at the edges.
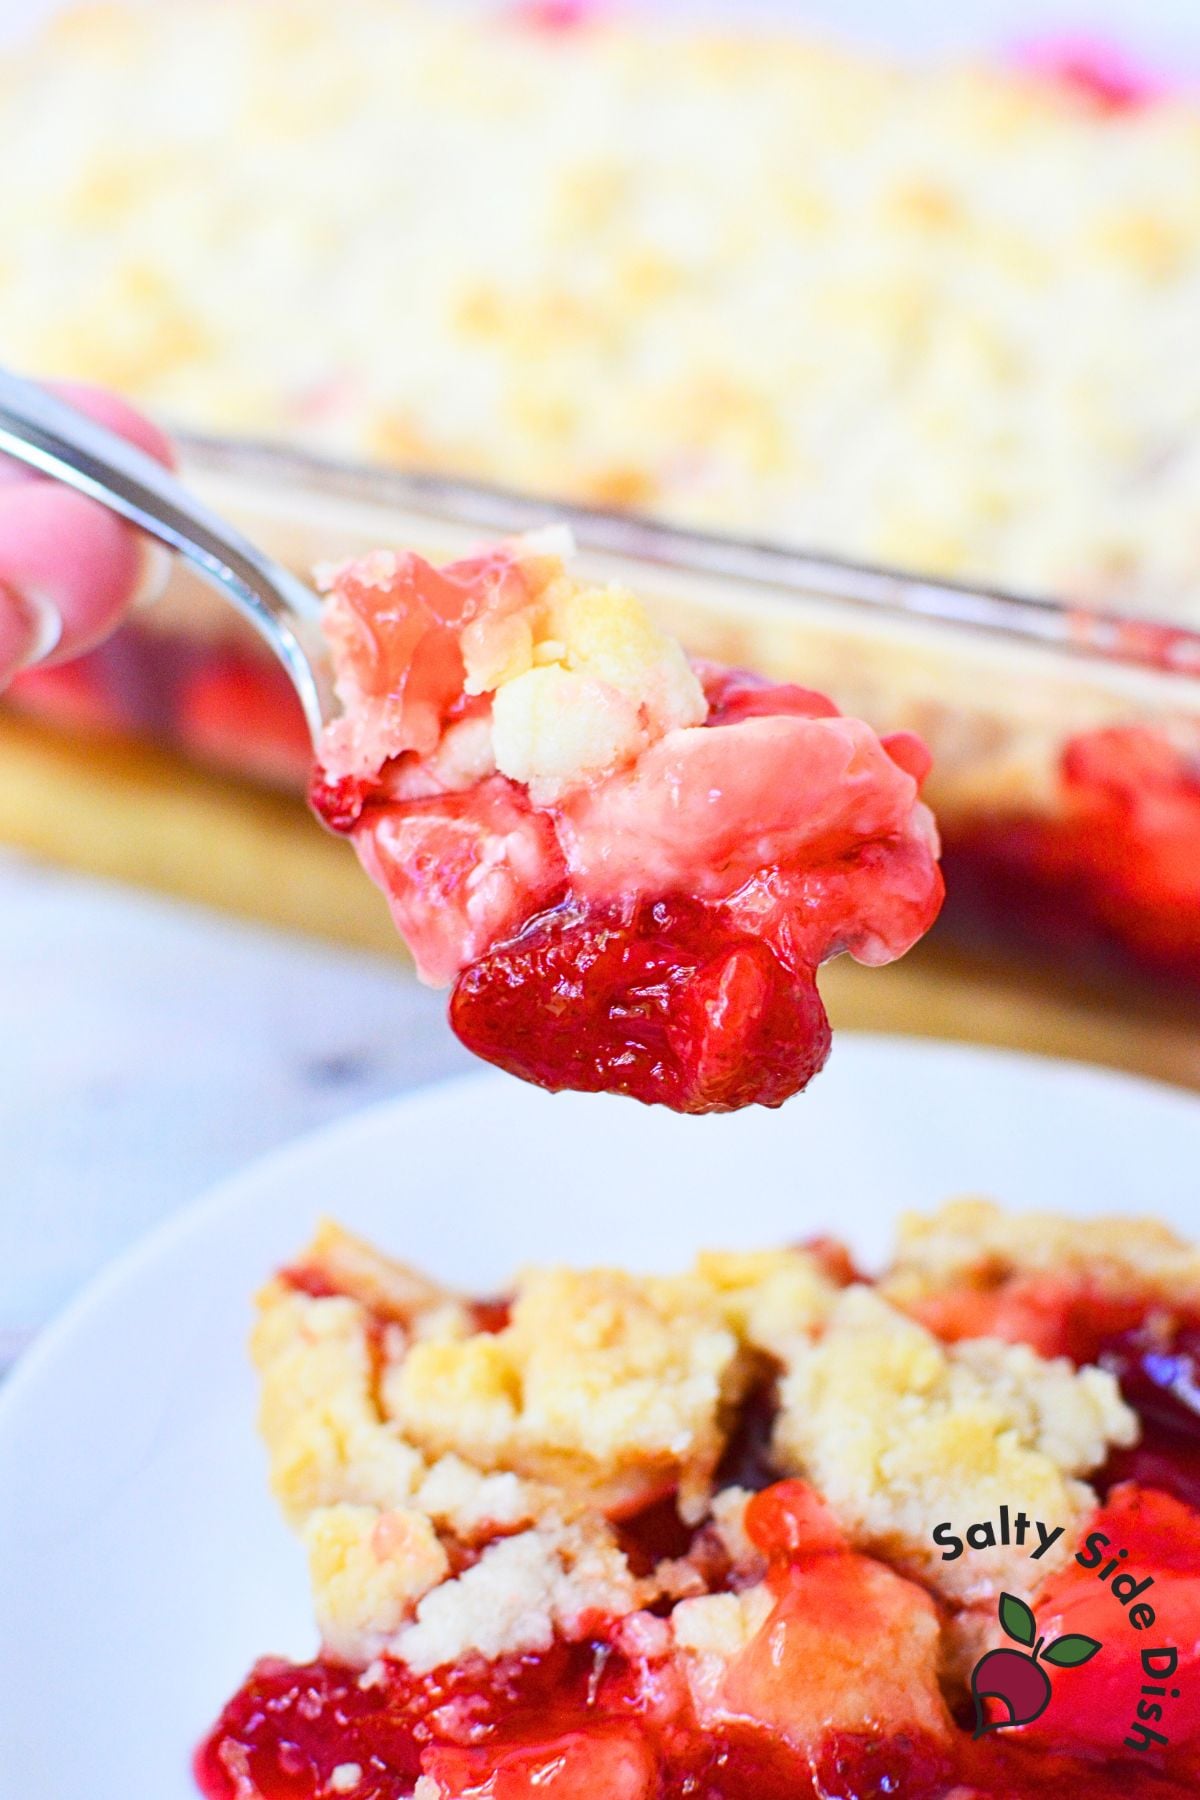
Cool and serve. Let the cake rest for about 10 minutes before serving warm with ice cream.
Helpful Tips
- Cut cream cheese small. Big scoops won’t melt evenly; small pieces mix into the strawberry filling better.
- Don’t skip the butter mix. Some dump cakes call for dry cake mix sprinkled on top, but combining it with butter gives a more even crust.
- Know your texture. The filling will remain gooey, like a cobbler, not firm like a cake. That’s part of the charm.
If you prefer a lighter texture, try my blueberry dump cake — it bakes up with a similar buttery crust but pairs great with vanilla ice cream for summer.
Variations
- Cherry Cheesecake Dump Cake – Swap strawberry pie filling for cherry, or try my chocolate cherry dump cake if you like a richer flavor combo.
- Mixed berry version – use blueberry or raspberry pie filling.
- Extra cheesecake flavor – mix 2–3 tablespoons of powdered sugar into the cream cheese before adding it.
- Nut topping – sprinkle chopped pecans or almonds on top before baking for crunch.
For fall baking, this same method makes a cozy pumpkin pie dump cake, and if you’re craving something fruity, my peach cobbler dump cake is always a hit at potlucks.
Serving & Storage
This dump cake is best served warm the same day. Cover leftovers and refrigerate up to 3 days. Reheat in the microwave before serving.
If you’re making it for a party, you can bake it earlier in the day, then warm it again in the oven at 300°F for about 10 minutes before serving.
For another classic, make sure to try my apple dump cake, which is a fall favorite and pairs perfectly with cinnamon ice cream.

Strawberry Cheesecake Dump Cake
Equipment
Ingredients
- 42 oz strawberry pie filling
- 8 oz cream cheese softened and cut into cubes
- 15.25 oz white cake mix
- ½ cup butter melted
Instructions
- Preheat oven to 350°F. Lightly grease a 9×13 baking dish with nonstick spray to prevent sticking and make cleanup easier.
- Spread both cans of strawberry pie filling evenly in the bottom of the dish, making sure the fruit is distributed to cover the surface.
- Cut the softened cream cheese into small cubes (about ½ inch) and scatter them evenly over the pie filling. Smaller pieces melt into the filling better, giving you cheesecake flavor in every bite.
- In a medium bowl, stir together the dry cake mix and melted butter until the mixture looks crumbly, like damp sand.
- Sprinkle the crumbly mixture evenly over the filling, breaking up any large clumps with your fingers so the topping covers the entire surface.
- Bake uncovered for 35 minutes, or until the top is lightly golden and the edges of the filling are bubbling. The center should look set, not doughy.
- Remove from the oven and let the dump cake rest for at least 10 minutes. This helps the filling thicken slightly and makes serving easier.
- Serve warm on its own or add a scoop of vanilla ice cream for a creamy contrast to the fruity filling.
Nutrition
Nutritional Disclaimer: The nutritional data provided here is auto-calculated and intended for your convenience only. As it’s generated via automation, its accuracy may be compromised. For precise nutritional insight, please compute the values utilizing the actual ingredients in your recipe through your chosen nutrition calculator or application.
Did You Make This Recipe?
Make sure to follow Salty Side Dish on Pinterest and rate the recipe here and make sure to leave a comment below!