
Garlic Cream Cheese Disks
This post may contain affiliate links. Please read the Privacy Policy & Cookie Policy.
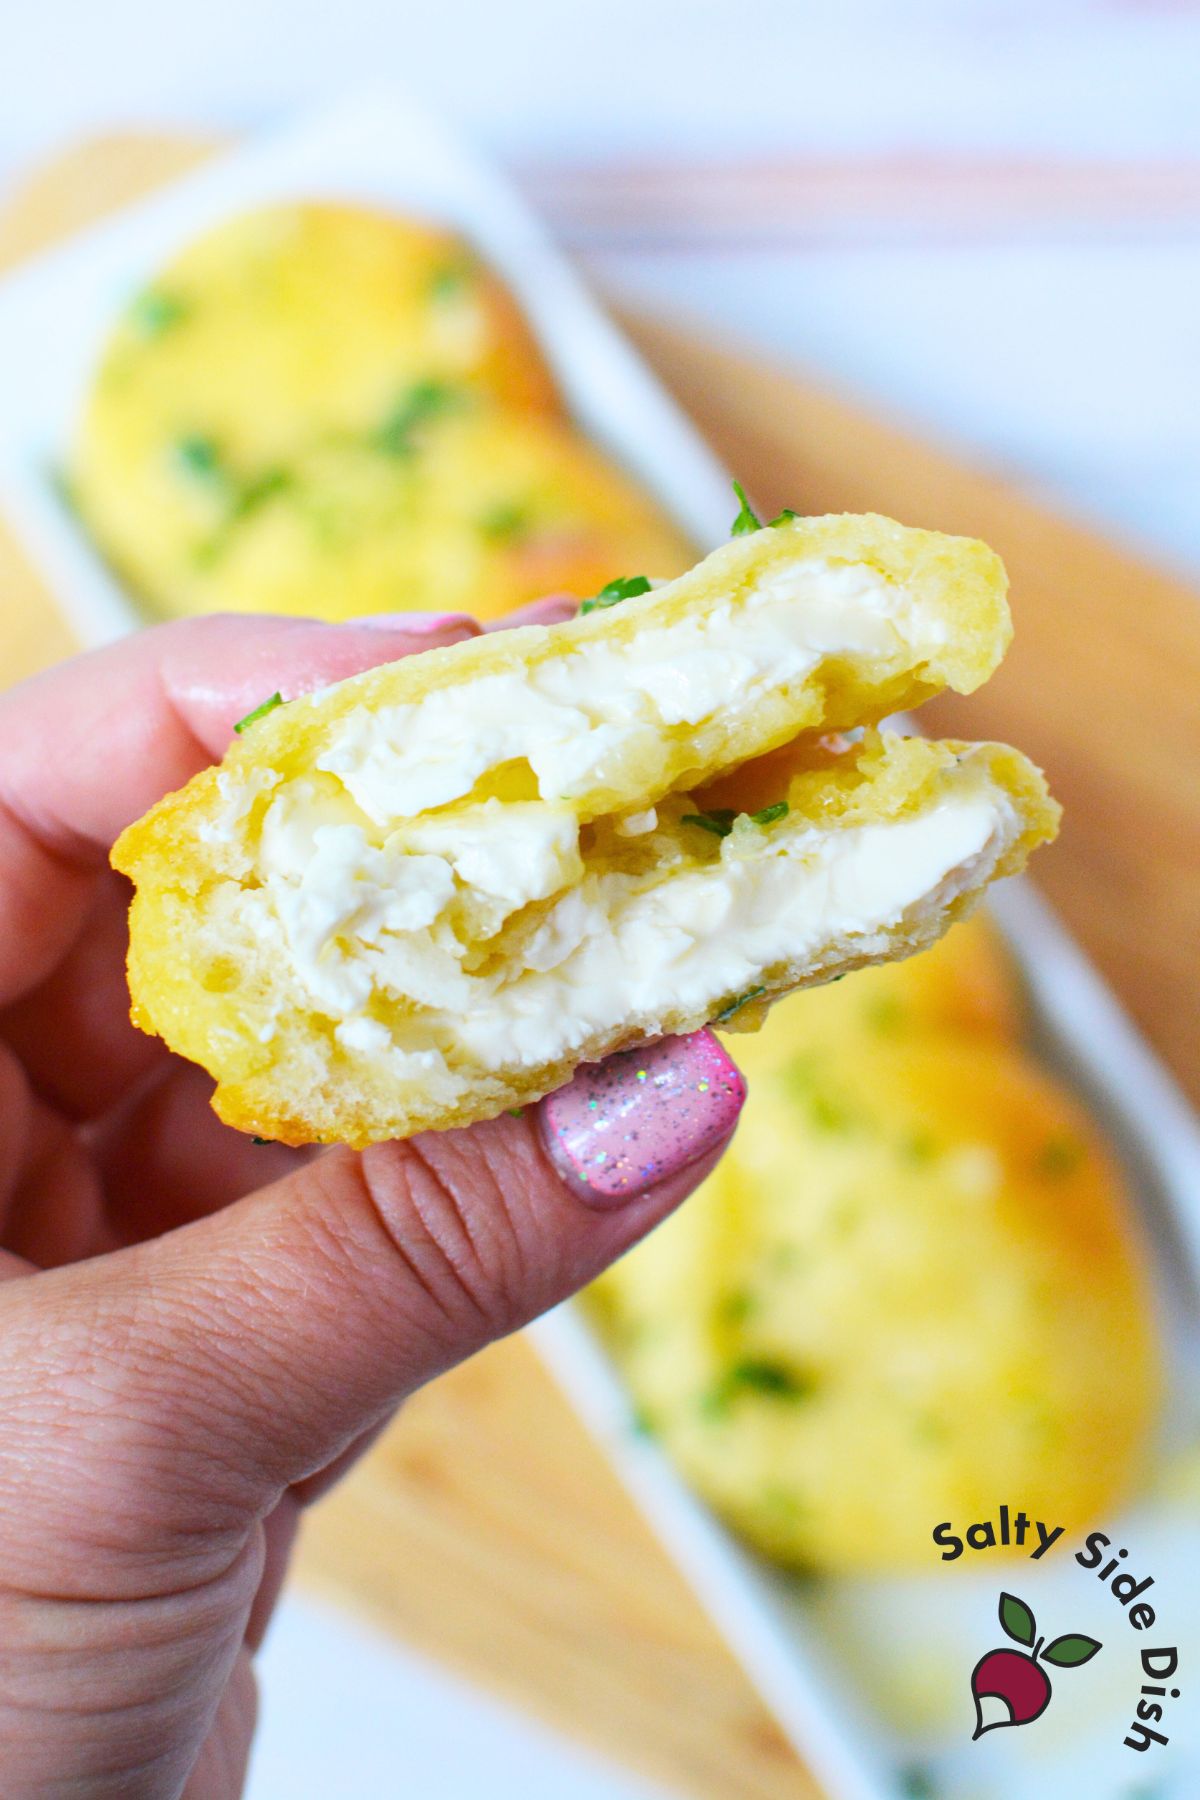
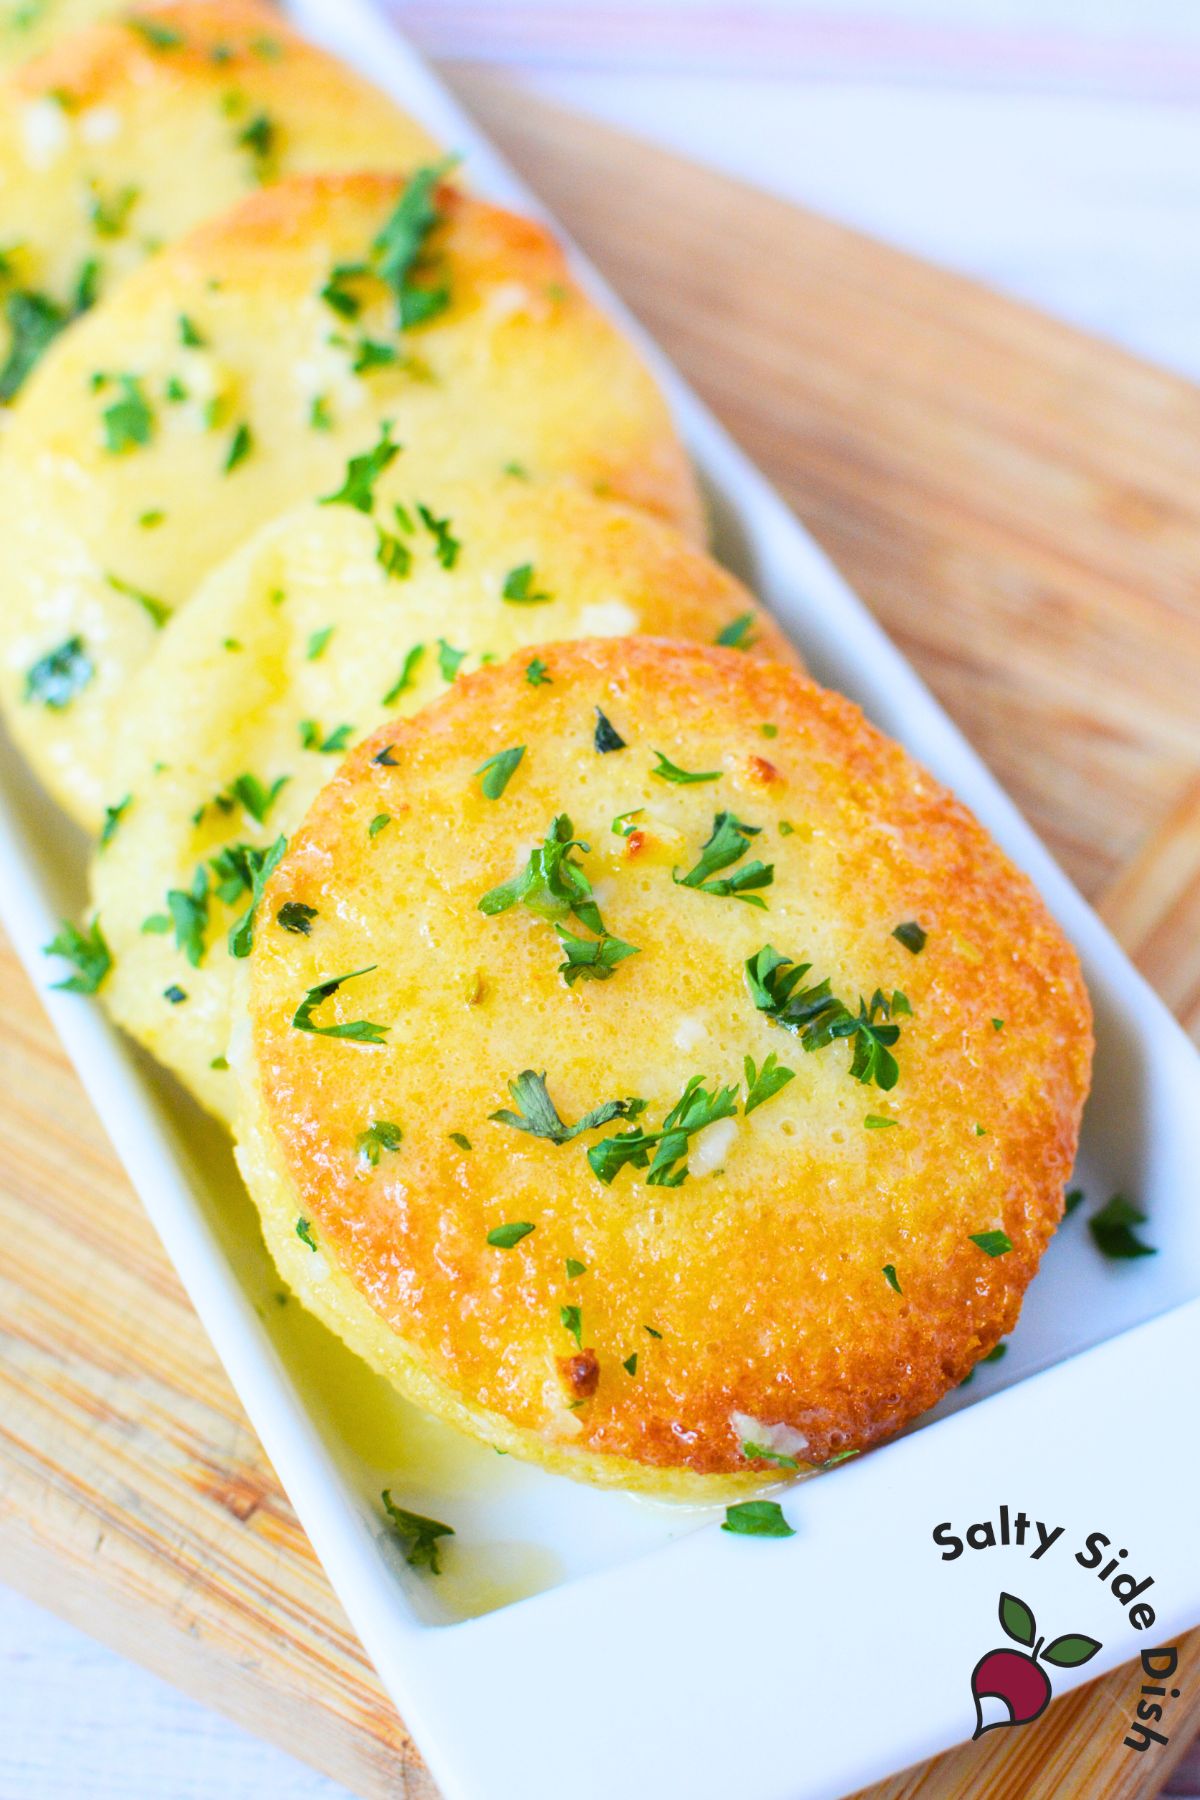
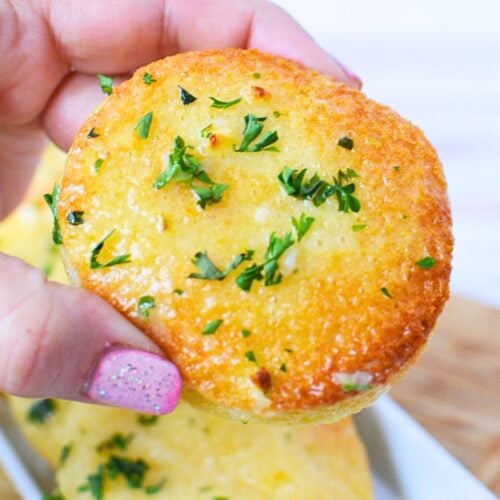
These garlic cream cheese disks are crispy, buttery, and filled with creamy goodness in every bite. Made from simple sandwich bread and stuffed with a dollop of cream cheese, they’re baked until golden and then coated in a savory garlic butter sauce.
Perfect for dunking in soup or serving as a cozy finger food appetizer, this viral snack is quite addictive.

I first spotted this recipe on TikTok and Facebook from chef Jason Orytnski and instantly saved it to try.
After testing, I made one big change: I cut the cream cheese in half. The original version used a heaping amount in each disk, but I found that too much. While I love cream cheese, I can’t eat a straight scoop of it with no balance. Reducing the filling made the flavor more enjoyable and kept the texture just right.
Ingredients
- 1 loaf (16 oz) sliced white bread
- 1 brick (8 oz) cream cheese, softened
- 1 stick (1/2 cup) butter, cubed
- 8 garlic cloves, minced
- 2 tablespoons chopped fresh parsley
- Pinch of salt
- 1/2 cup milk
- 1 egg
Worth mentioning, these disks get dipped in a warm butter and egg mixture both before and after baking. At first, I wasn’t sure if the egg would actually cook, so I looked it up and wrote more on it at the end of the article.
How to Make Garlic Cream Cheese Disks
Preheat the oven to 375°F. Line a baking sheet with foil and place a wire rack on top. Spray the rack with nonstick spray.
Add about two tablespoons of softened cream cheese to the center of one bread slice. Top with a second slice.
Use a round cookie cutter or sandwich sealer like this one to cut and seal the bread, forming a filled disk. Discard the crusts or save them for French toast casserole.
Repeat with remaining bread and cream cheese until you’ve made about 12 to 14 disks.
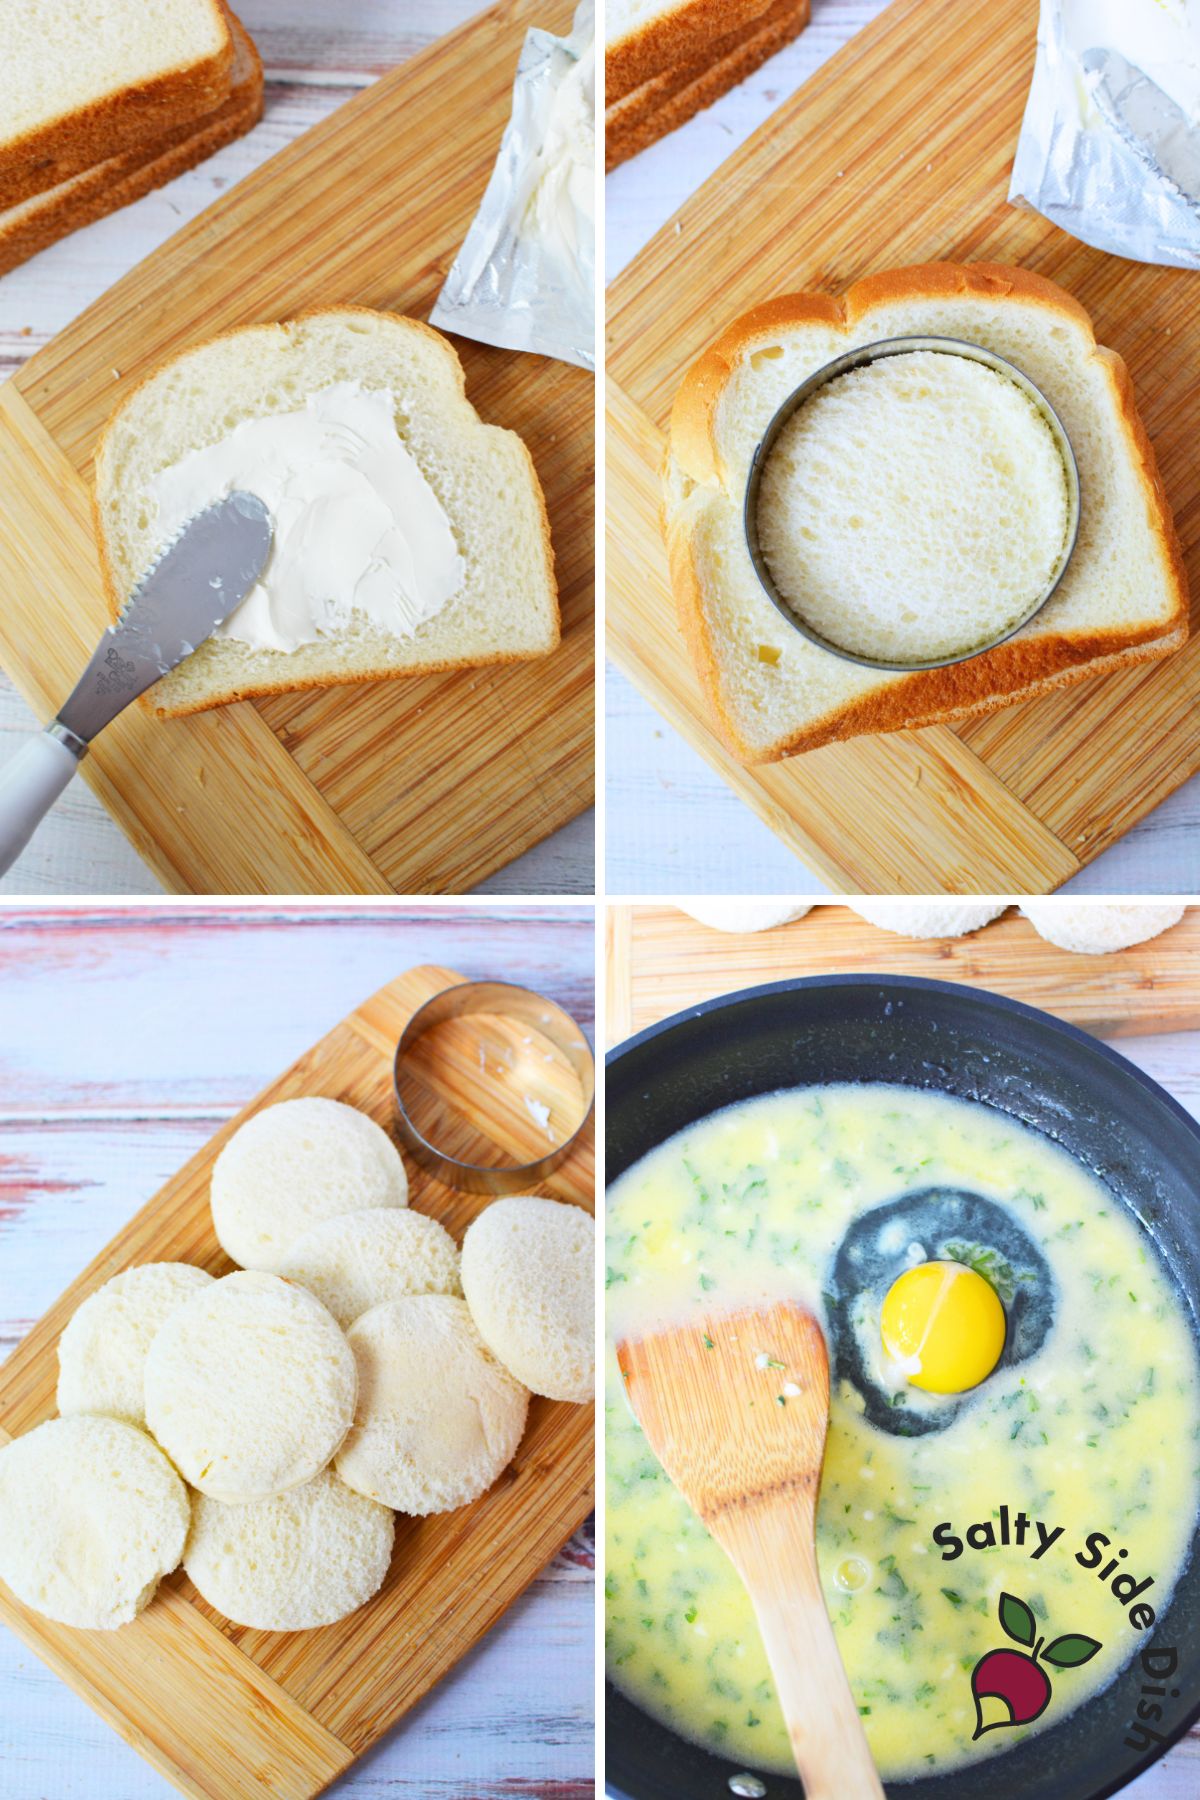
In a skillet over medium-low heat, melt the butter with garlic and parsley. Stir occasionally. Reduce the heat and stir in milk and a pinch of salt. Whisk in the egg until fully incorporated. The heat should stay low so the egg doesn’t scramble.
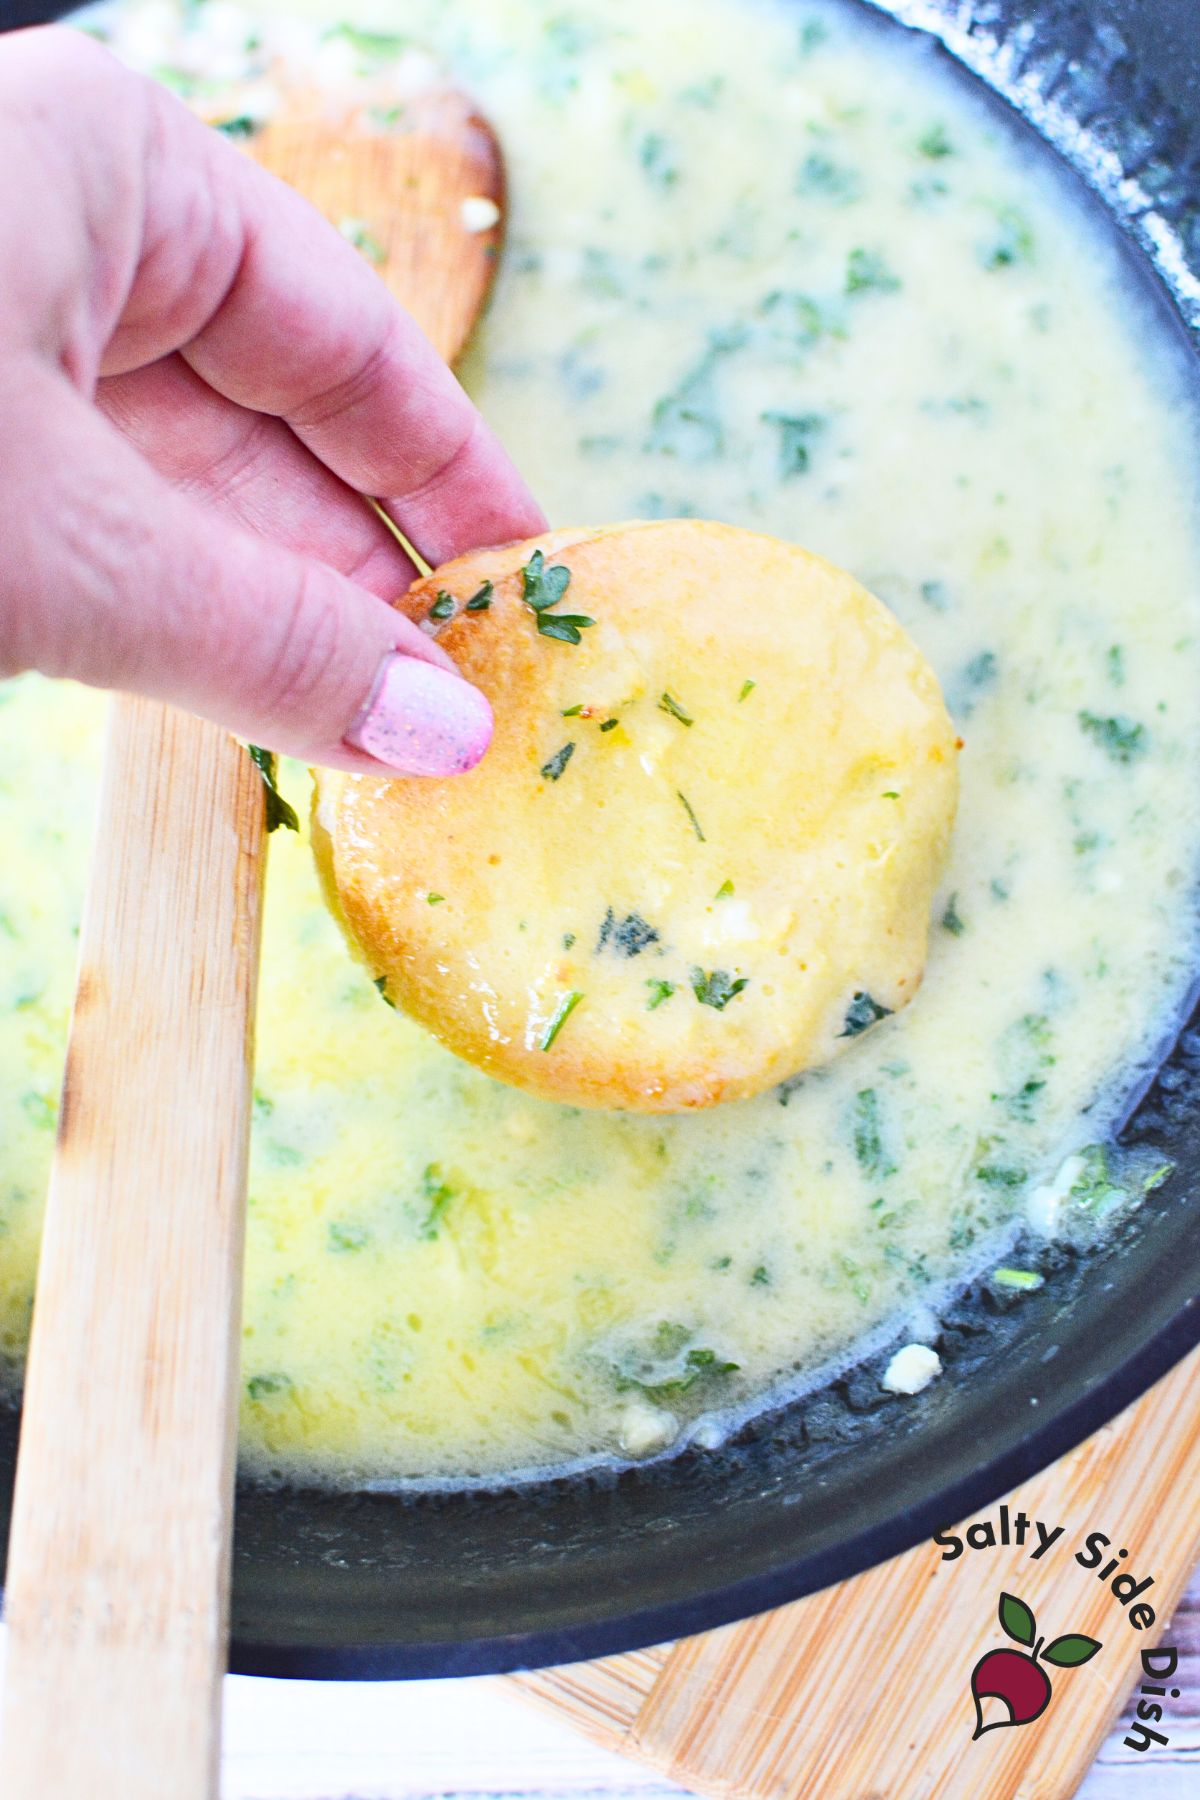
Carefully dredge each cream cheese disk in the garlic butter mixture, coating both sides.
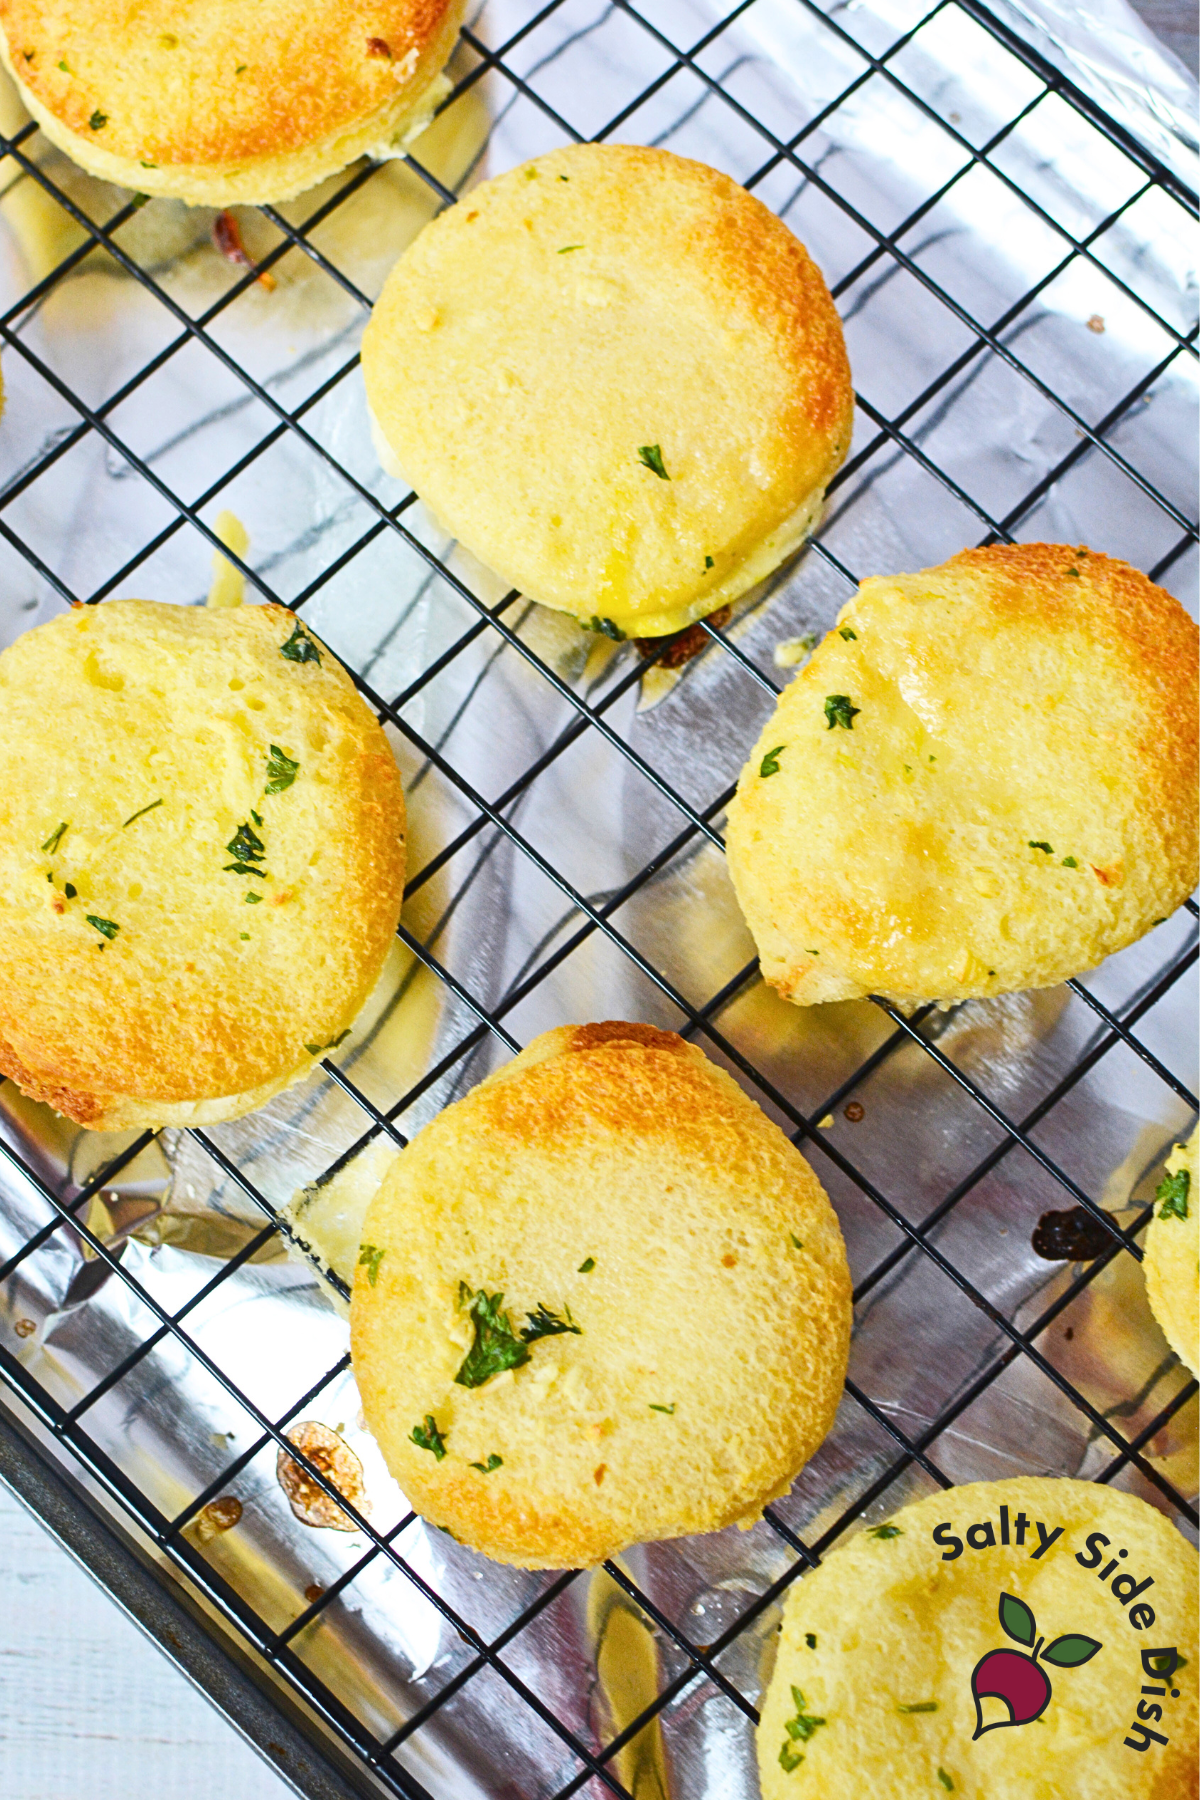
Place the disks on the wire rack and bake for 20 minutes, until golden and slightly crisp.
After baking, you can optionally dredge each disk one more time in the remaining garlic butter for an extra flavor boost. Serve immediately while hot.
Helpful Tips and Variations
These garlic cream cheese disks are best served warm, fresh from the oven, when the edges are crisp. Any leftover garlic butter can be put to good use, brush it over roasted vegetables.
I went with a light layer of cream cheese to keep the ratio just right, but feel free to add more for a richer bite, or experiment with some of the flavored cream cheese options available in stores.
Just keep an eye on your oven as they bake; I noticed the back row browned a little faster, so it’s worth rotating the tray halfway through for even cooking.
A Quick Word on Egg Safety
When I first made these, I wondered if the egg in the garlic butter mixture was fully cooked. According to the USDA, eggs need to reach 160°F to be considered safe. Since the butter mixture is warm but not boiling, it likely doesn’t hit that temperature.
The disks are baked afterward, so that does help. However, if you’re cooking for someone who is pregnant, elderly, or immune-compromised, using pasteurized eggs is a smart option. I am someone that still eats cookie dough out of the fridge, so its not a personal concern for me.
What to Serve Garlic Disks With
These garlic cream cheese disks are made for dipping. I like serving them with a bowl of Pea and Ham Soup or Italian Pastina Soup for a cozy, comforting combo.
They’re also great with something a little creamier, like this Roasted Red Pepper and Gouda Soup that’s full of rich, savory flavor.

More Bread Recipes to Try
If you’re into buttery bread recipes, here are a few more you’ll want to save. Try this Hawaiian Roll Garlic Bread for a soft, pull-apart option that’s perfect for dinner or parties.
If you’re in the mood for something extra cheesy, my TikTok-Inspired Cheesy Garlic Bread is always a hit. Or go all in with Fried Garlic Bread, which is crispy, rich, and packed with flavor.
If you want a really easy way to seal sandwiches and make other stuffed and homemade uncrustables, try this Sandwich Sealer that you can get on amazon. Great with PBJ too!
Garlic Cream Cheese Disks
Ingredients
- 1 loaf sliced white bread 16 oz
- 8 oz cream cheese softened
- 1/2 cup unsalted butter cubed
- 8 garlic cloves minced
- 2 tablespoons chopped fresh parsley
- Pinch of salt
- 1/2 cup milk
- 1 large egg
Instructions
- Preheat the oven to 375°F. Line a baking sheet with foil, place a wire rack on top, and spray the rack with nonstick spray.
- Spread cream cheese (about 2 tablespoons) into the center of one slice of bread. Top with a second slice.
- Use a round cookie cutter to press down and cut out a circle, sealing the cream cheese inside and discarding (or saving) the crusts. Repeat with remaining bread and cream cheese until you have about 12 to 14 disks.
- In a large skillet over medium-low heat, melt the butter. Add the garlic and parsley and cook for 1 to 2 minutes until fragrant. Reduce heat to low and stir in the milk and a pinch of salt. Add the egg and whisk quickly to combine. The mixture should be kept on low, not hot, to avoid cooking the egg.
- Carefully dip each bread disk into the warm garlic butter mixture, coating both sides well.
- Place disks onto the prepared rack and bake for 20 minutes, or until golden brown and slightly crispy on top.
- Remove from the oven and dredge each disk one more time in the remaining garlic butter mixture. Serve hot.
Notes
- These are best enjoyed warm and fresh.
- Try using flavored cream cheese for variety.
- Ovens vary, so rotate the tray halfway through baking if needed.
- If you’re concerned about egg safety, consider using a pasteurized egg.
Nutrition
Nutritional Disclaimer: The nutritional data provided here is auto-calculated and intended for your convenience only. As it’s generated via automation, its accuracy may be compromised. For precise nutritional insight, please compute the values utilizing the actual ingredients in your recipe through your chosen nutrition calculator or application.
Did You Make This Recipe?
Make sure to follow Salty Side Dish on Pinterest and rate the recipe here and make sure to leave a comment below!


