White Chocolate Bark
This post may contain affiliate links. Please read the Privacy Policy & Cookie Policy.
White chocolate bark, commonly known as Christmas bark, is a delightful sweet treat for the cheerful festive season.
This bark recipe is perfect for those searching for a homemade gift or simply a delicious dessert to share with loved ones and doesn’t require an oven!

Why Choose White Chocolate Bark?
Simple Customization: The toppings for your bark recipe can range from festive sprinkles to nuts and dried fruit. Make it uniquely yours!
No Baking Needed: Among the holiday hustle, a no-bake dessert recipe is a blessing. Let the little ones have fun decorating while the Christmas breakfast casserole or holiday ham is being prepared.
Perfect for Gifting: Easily stored, this treat also makes an excellent homemade gift. Plus, you can make large batches for yourself and eat all month long.
Simple Ingredients for Christmas Bark
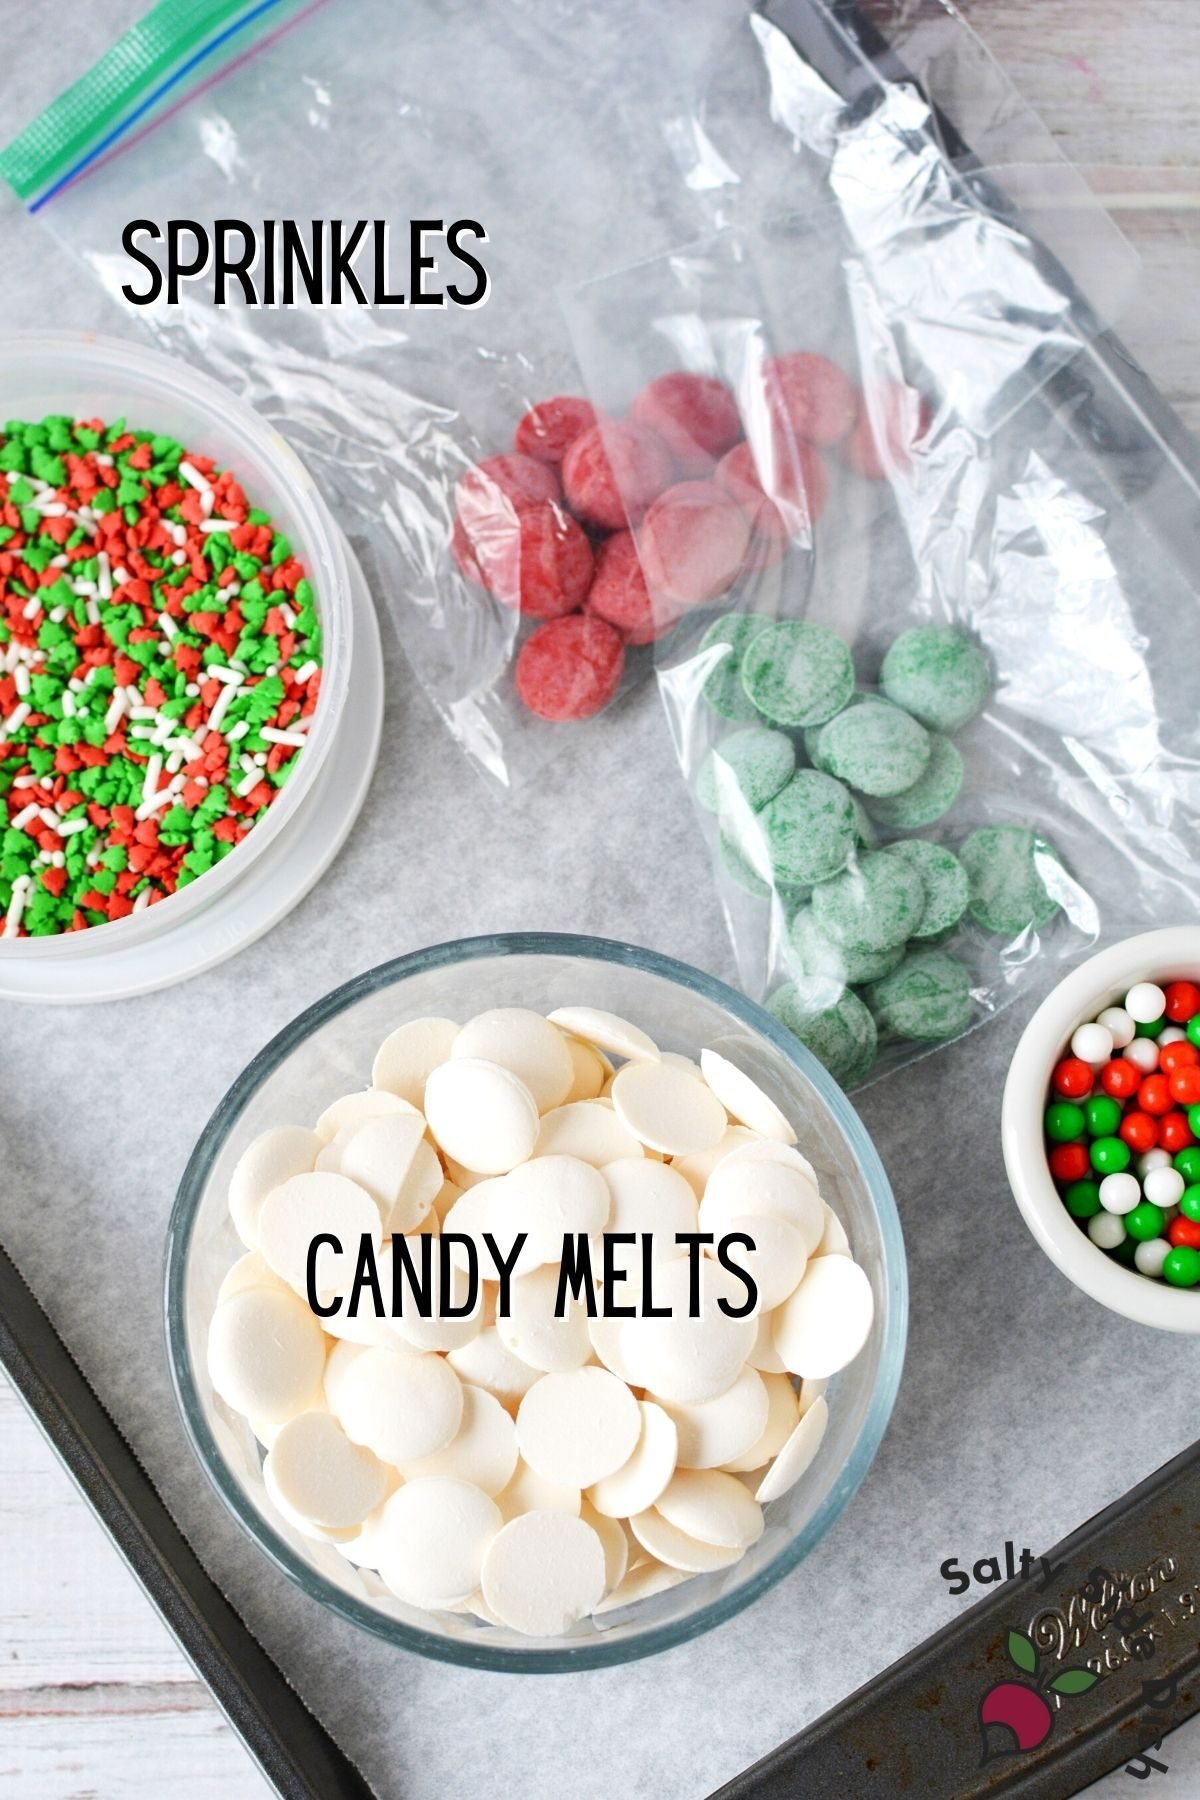
- Bright white candy melts: This serves as the bottom layer of the bark. While other types of chocolate can be used, candy melts ensure a smooth and flawless finish.
- Dark green candy melts & red candy melts: For that festive touch – perfect for creating a Christmas dessert theme.
- Holiday sprinkles & candy pearls: For an extra splash of holiday spirit.

How to Make Easy White Chocolate Bark for Christmas
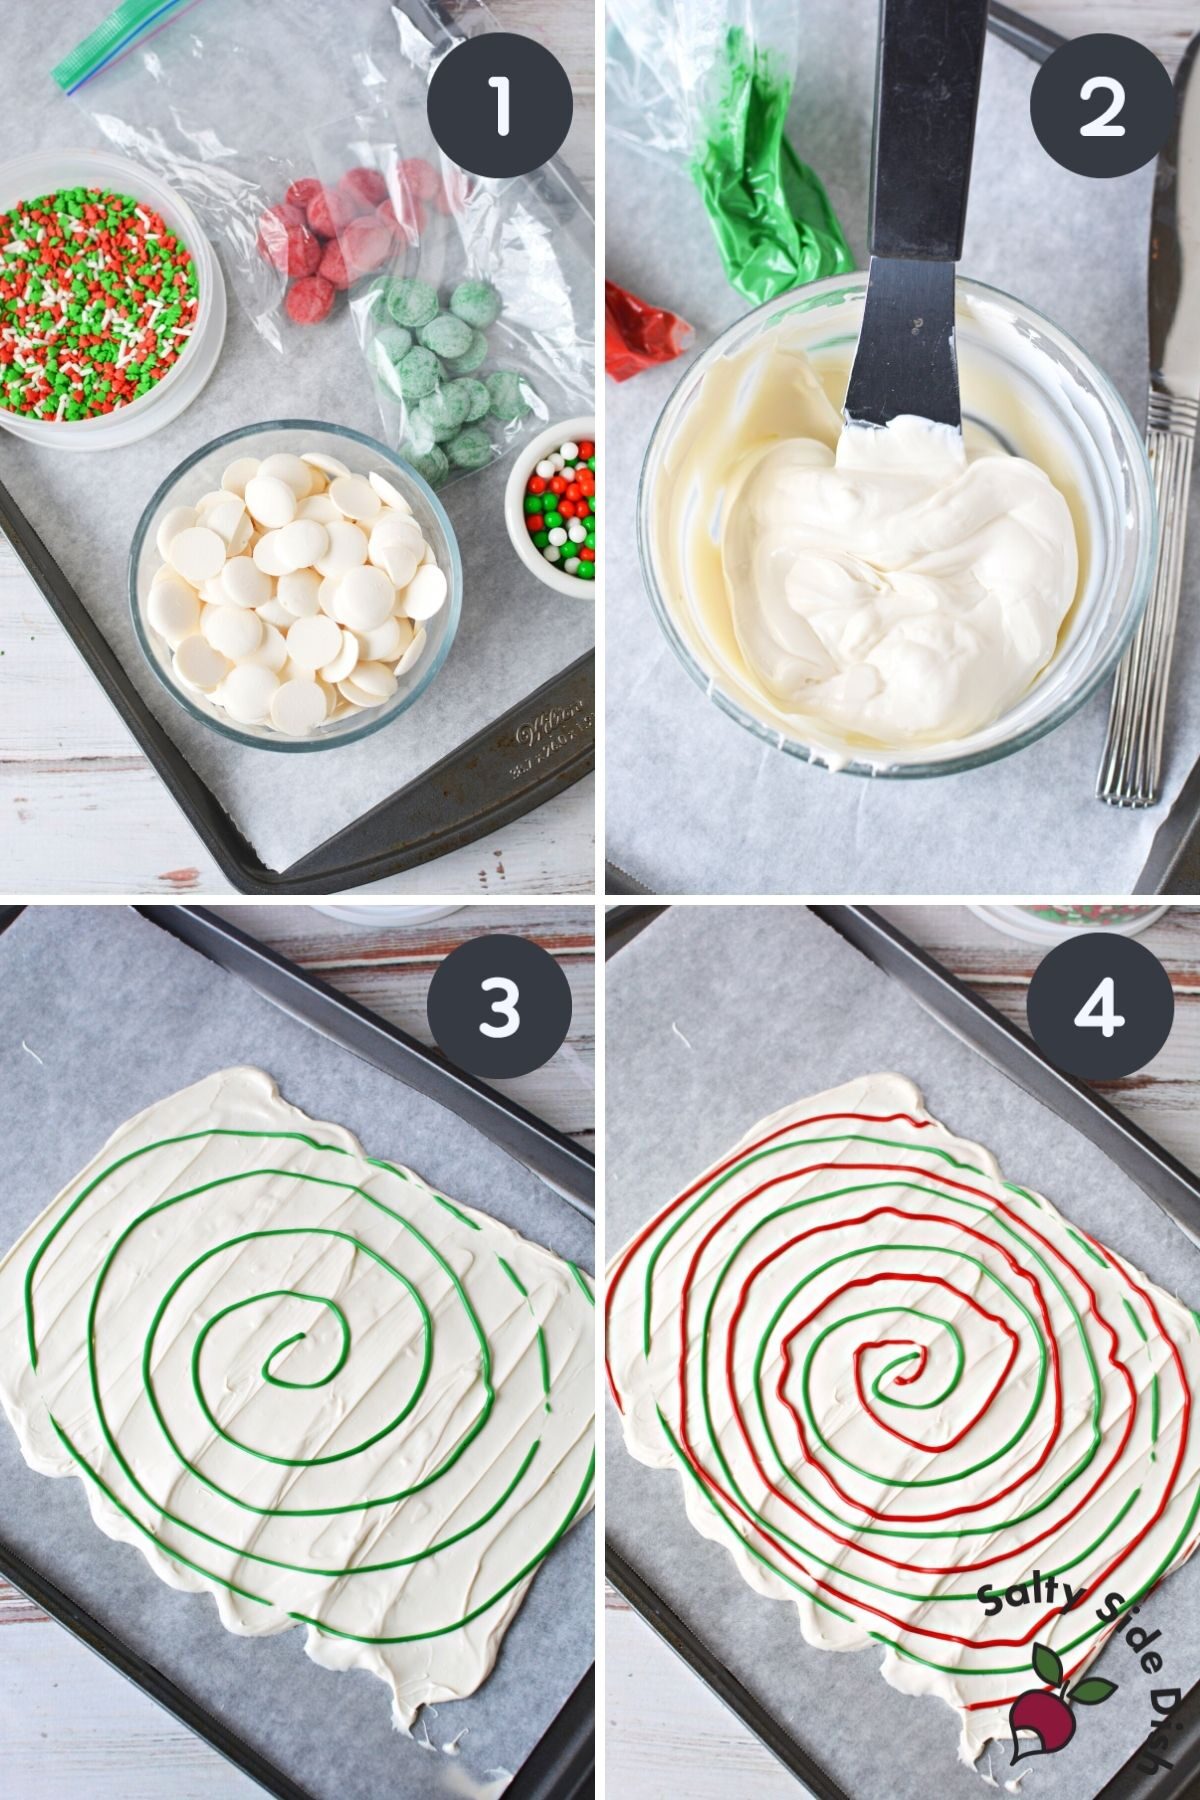
Prep Your Baking Surface: Lay a sheet of parchment paper on a rimmed baking sheet (cookie sheet) and keep it ready.
- Prepping Candy Melts: Pour dark green candy melts into one resealable sandwich bag without sealing it. Repeat the process with red candy melts using another bag.
- Melting White Candy Melts: In a microwave-safe bowl, add bright white candy melts. Microwave at half power (50%) for a duration of 60 seconds. Take out, stir, and microwave again, stirring intermittently, until fully melted. Once done, maintain its warmth by setting it aside.
- Melting Colored Candy Melts: Place the unsealed bags of candy melts in the microwave. At 50% power, microwave them for 30-second increments. Afterward, knead and flip each bag. Continue this microwaving and kneading process until the candy melts are entirely liquid.

- Prepping the Bags: Seal each bag and make a small cut at its tip to allow for precise pouring.
- Laying the White Base: Swiftly spread the molten white candy melts onto the laid-out parchment paper, achieving a thickness of roughly 1/8″. Using a spatula can be especially helpful here.
- Creating Spirals: Beginning from the bark’s center, make spiral patterns using the dark green candy melts. Follow up with a similar spiral using the red candy melts.
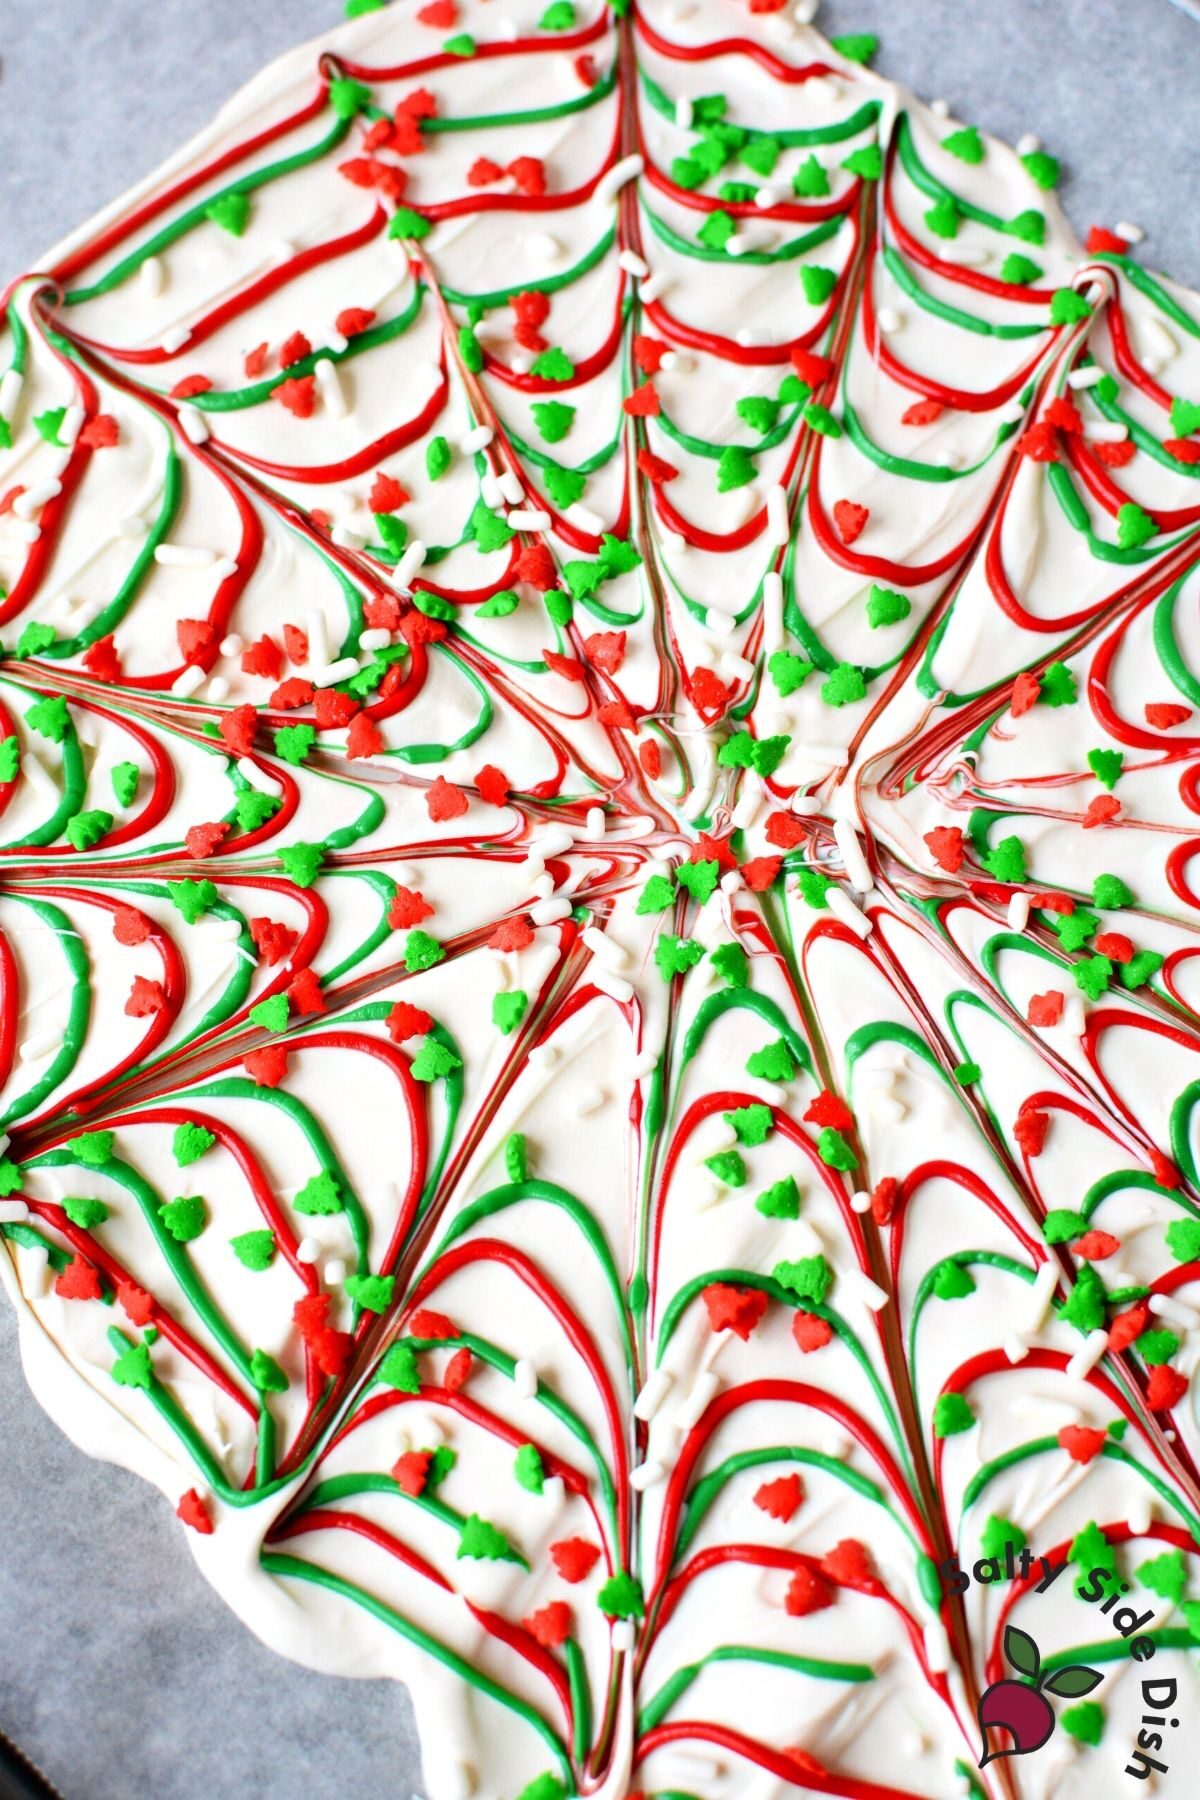
- Swirling the Colors: Take a knife and drag it through the candy’s center, swirling the colors together for a marbled effect.

- Adding the Final Touches: Garnish your creation with festive sprinkles and candy pearls for that holiday feel.
- Setting the Bark: Allow it to sit until it hardens. For a quicker setting, you can place it in the freezer for about 5-10 minutes. Break bark into pieces and serve.
See other ways to make bark with this grinch dessert with bright green bark and our non-Christmas but lots of fun Unicorn Bark, with swirly rainbows. Or if you love white chocolate, try newly published white fudge.
FAQs About Making Chocolate Bark
What are Candy Melts?
Candy melts, also commonly referred to as confectionery coating or melting wafers, are flavored and colored bits designed for easy melting and setting.
Ingredients: Unlike traditional chocolate, candy melts do not contain cocoa butter. Instead, they often contain vegetable oils, sugar, milk solids, and flavorings.
Melting: Candy melts are specifically designed to melt smoothly and easily, often without the need for tempering (a process often required when melting real chocolate to maintain a shiny appearance and snappy texture once it sets).
Storage: Candy melts have a longer shelf life than traditional chocolate. They set at room temperature and don’t require refrigeration, although they can be refrigerated to expedite the setting process.
Availability: Candy melts can be found in craft stores, some supermarkets in the baking aisle, or specialty stores.
Which toppings go best for a holiday bark recipe?
- Sprinkles: Festive sprinkles like Betty Crocker Festive Trees and Celebration Pearls Candy in Red, White, and green are excellent choices.
- Nuts: Crushed nuts, whether peanuts or almond slivers, provide a crunchy texture contrast.
- Chocolate Candies: Mini chocolates, such as holiday M&M’s or peanut butter cups, enhance the sweet treat.
- Dried Fruits: Dried cranberries complement the white chocolate beautifully. Other options include dried cherries or blueberries.
- Additional Ideas: Consider peppermint pieces, crushed cookies, potato chips, or even multi-layered bark with varying candy colors. Or add a drop or two of peppermint extract for a refreshing twist.

Expert Tips for the Best Bark Recipe
- For beginners, candy melts or specific melting chocolates like almond bark are recommended over natural chocolate. This ensures a smoother melting process without the risk of the chocolate seizing.
- Familiarize yourself with the double boiler method for melting quality chocolates. This method can prevent common mistakes and frustrations associated with the microwave technique. See below.
Double Boiler Method for Melting:
While we don’t recommend using solid chocolate for Christmas bark, if you want to, there is a better method than the microwave.
Here’s how to perfectly melt milk chocolate, dark chocolate, or chocolate chips using a double boiler, which prevents chocolate from seizing:
- Fill a pot with a few inches of water and bring it to a simmer.
- Place a heat-safe bowl on top, ensuring the bottom doesn’t touch the water.
- Add the chocolate to the bowl. Stir continually with a rubber spatula until they melt seamlessly. The gentle, indirect heat ensures your chocolate mixture doesn’t seize or burn.
Storage and Shelf Life of Chocolate Homemade Treats
To store your homemade white chocolate bark, place it in an airtight container. If storing multiple layers, use parchment paper in between to prevent sticking.
Keep it in a cool, dry place.
Properly stored bark can last at room temperature for up to two weeks. If you decide to refrigerate it, it can last for up to a month, but ensure it’s kept away from foods with odor.

Christmas Sweets Spotlight: Diving into Fudges, Pretzels, and Candies
Homemade Fudge Recipes & More: After mastering easy white chocolate bark, why not make a few more holiday treats! Elevate the cookie exchanges and baking tin with our mouthwatering recipes that are meant to be shared:
- Homemade Chocolate Fudge: A classic melt-in-the-mouth delight, this chocolate fudge is dense, rich, and every chocolate lover’s dream.
- Peanut Butter Fudge: Creamy, slightly salty, and oh-so-peanut-buttery, this fudge balances sweet and savory.
- Pretzel Christmas Trees: A delightful treat that’s fun to make and eat! These pretzel-based trees are adorned with green candy melts and festive sprinkles, bringing the magic of Christmas in every bite.
- Cream Cheese Mints: These mints are soft, refreshingly minty, and have a hint of cream cheese tang, making them utterly addictive.
- Cinnamon Rock Candy: Experience a burst of warmth with our cinnamon rock candies. They’re the perfect winter warmer and a great addition to any holiday treat platter.

White Chocolate Bark (No Bake Recipe)
Equipment
- Baking Sheet
- Parchment Paper
- ziplock baggies
Ingredients
- 12 oz. bright white candy melts
- 2 tbsp dark green candy melts
- 2 tbsp red candy melts
- holiday sprinkles
Instructions
- Place parchment paper onto a baking sheet. Set aside.
- Place dark green candy melts into a resealable sandwich bag but do not seal shut. Do the same with the red candy melts into a separate bag.
- Place bright white candy melts into a microwave-safe bowl and microwave on 50% power for 60 seconds. Stir. Return to microwave, heating, and stirring until melted. Set aside and keep warm.
- Place bags of candy melts into a microwave. Heat for 30 seconds at 50% power. Knead each bag and flip it over. Return to the microwave and continue to heat and knead until completely melted.
- Seal the bag and snip a tiny opening in the tip of the bag.
- Working quickly, spread the bright white candy melts onto the prepared parchment paper until about 1/8" thick. A spatula works great for this.
- Draw spiral lines of dark green candy melts starting at the center of the bark.
- Repeat a spiral with the red candy melts.
- Drag a knife through the center of the candy swirling the colors.
- Sprinkle with holiday sprinkles and candy pearls.
- Let stand to harden. If needed quickly, place in the freezer for up to 5 minutes to set.
Notes
Nutrition
Nutritional Disclaimer: The nutritional data provided here is auto-calculated and intended for your convenience only. As it’s generated via automation, its accuracy may be compromised. For precise nutritional insight, please compute the values utilizing the actual ingredients in your recipe through your chosen nutrition calculator or application.
Did You Make This Recipe?
Make sure to follow Salty Side Dish on Pinterest and rate the recipe here and make sure to leave a comment below!


